 WalletFeed
Send Apple Card transactions to a webhook
WalletFeed sends your Apple Card, Apple Cash and Savings transactions from your iPhone to a webhook. A webhook is an https:// URL in n8n or on your server. WalletFeed sends each new or changed transaction to that URL in JSON format.
Before you start
For this procedure, you must have:
- An iPhone with iOS 26 or a newer version. WalletFeed is available only in the US.
- Apple Card, Apple Cash or Savings in Wallet on that iPhone.
- WalletFeed with WalletFeed Pro. WalletFeed Pro is a subscription with a 1-week free trial, or a one-time Lifetime purchase.
- An n8n workflow, or a server that can receive HTTPS requests. The URL must start with
https://. - A computer for the steps in n8n or on your server.
WalletFeed also sends transactions when your iPhone is not on your home network. Thus, the URL must operate from the internet.
Your URL and secret stay on your iPhone
- WalletFeed keeps the URL, the authorization value and the signing secret in the Keychain on your iPhone. iOS encrypts the Keychain.
- These items do not go to iCloud Keychain or to your other devices.
- WalletFeed has no account and no servers. No person at WalletFeed can see or get these items.
- Your iPhone sends the URL and the authorization value only to your server. WalletFeed uses the signing secret to sign each request, but WalletFeed does not send the signing secret.
- When you delete the destination, WalletFeed deletes these items from your iPhone.
Step 1: Get a webhook URL
Do the steps for n8n, or the steps for your server.
Get the URL in n8n
The Webhook node in n8n gives you the URL. With Header Auth, the node also makes sure that each request has the correct Authorization value.
-
On your computer, open n8n.
-
Make a new workflow.
-
Click Add first step….
-
Select On webhook call.
Result: n8n adds a Webhook node to the workflow.
-
In HTTP Method, select POST.
-
In Authentication, select Header Auth.
-
In Credential for Header Auth, select Create new credential.
-
In Name, type
Authorization. -
In Value, type
Bearer, a space and a long password that you make. -
Keep a copy of the header value (the text in Value) for Step 2.
-
Save the credential.
-
In Respond, select Immediately.
-
Select Production URL.
-
Copy the URL that n8n shows.
-
Click Publish.
Result: n8n shows a window with a name for the version.
-
In that window, click Publish.
Result: n8n starts to receive requests at the Production URL.
-
Send the URL and the header value to your iPhone, for example with AirDrop.
You must use the Production URL in WalletFeed. The Test URL operates only for 120 seconds after you click Listen for test event.
If Respond is Immediately, n8n sends the status code when the workflow starts. WalletFeed waits a maximum of 30 seconds for the status code. If an error stops the workflow after n8n sends the status code, WalletFeed does not send the data again.
n8n uses only the version of the workflow that you published. If you change the workflow, you must publish it again.
If requests go to your n8n server through a reverse proxy, n8n gets the Production URL from the environment variable N8N_WEBHOOK_URL. The value of this variable must be your https:// address. Before n8n 2.35.0, the name of this variable was WEBHOOK_URL. From version 2.35.0, if you use WEBHOOK_URL, n8n writes a warning in its log.
Use your server
Your server must do these tasks:
- Accept
POSTrequests with a JSON body at anhttps://URL. - Send a status code from 200 to 299 after the server saves the data.
- Use the
idof each transaction to find the same transaction in the saved data. - Remove the transactions that have their IDs in
data.deletedIDs.
WalletFeed sends a transaction again when the transaction changes. If the server does not send a status code from 200 to 299, WalletFeed keeps the changes. WalletFeed sends them again each time that it sends data, until the server accepts them.
Webhook format gives the JSON format and the steps to examine the signature. You get the secret for the signature in Step 2.
Step 2: Add the webhook in WalletFeed
-
On your iPhone, open WalletFeed.
-
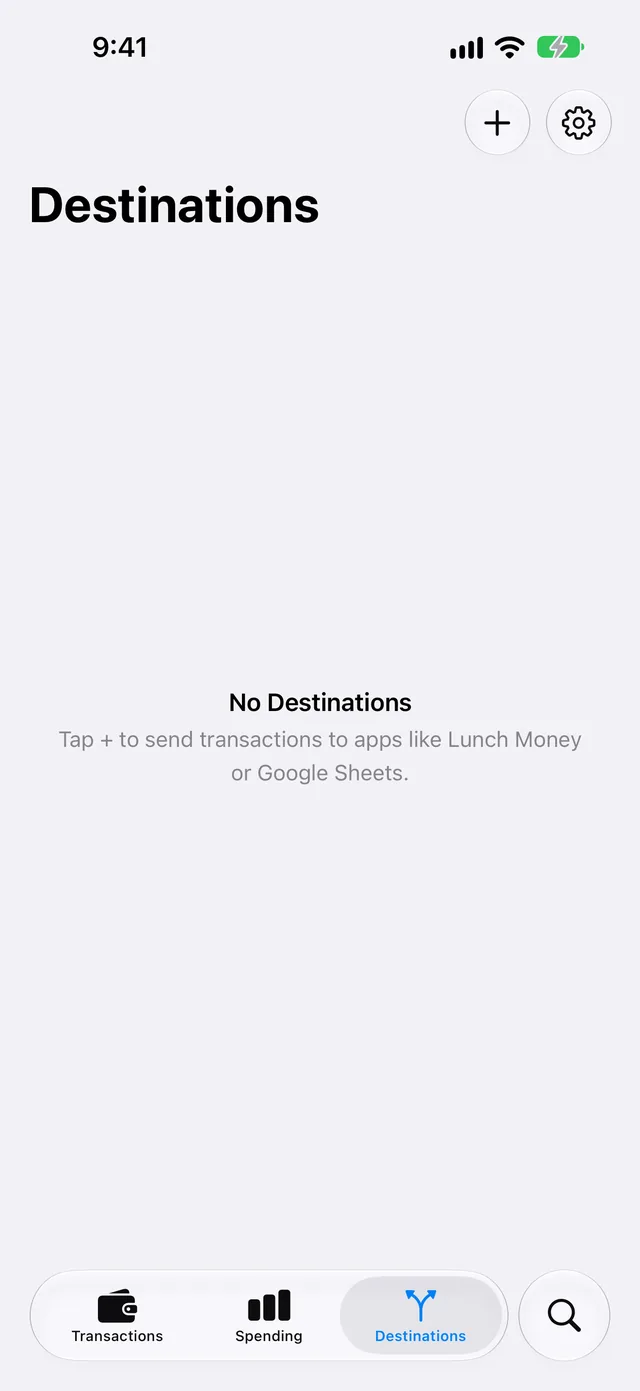
Tap Destinations.
-
Tap + at the top of the screen.
-
Tap Webhook, below Developers at the bottom of the list.
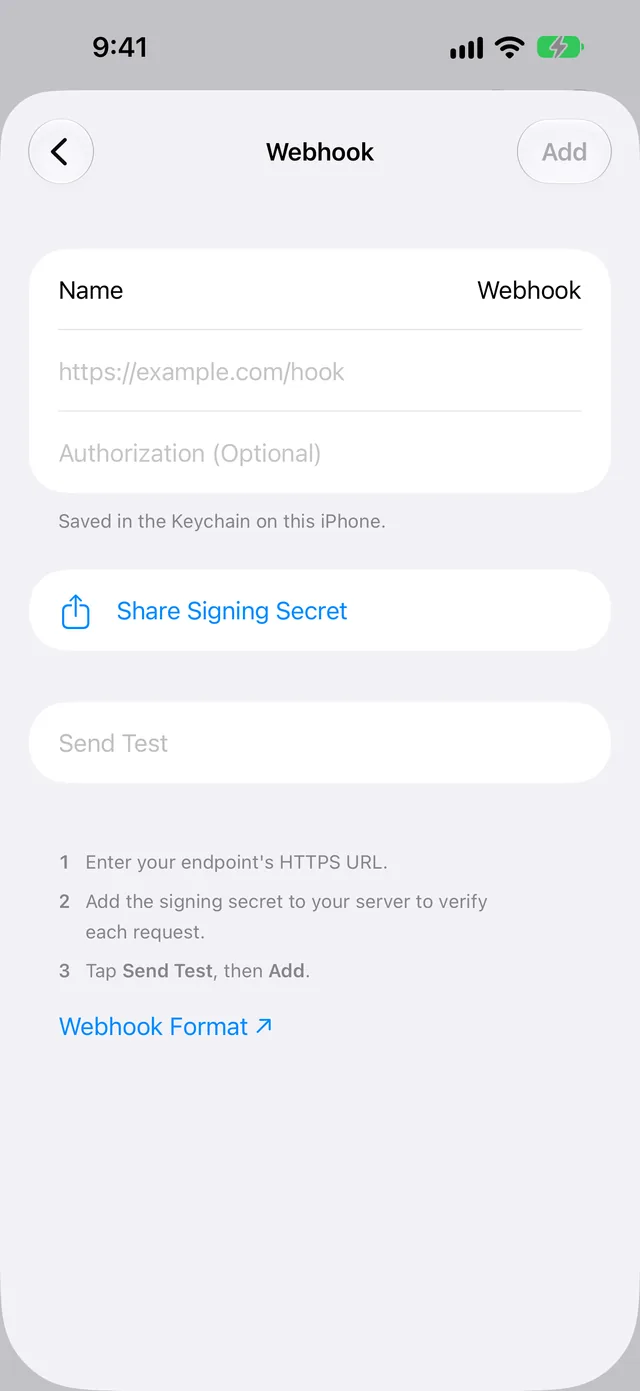
Result: WalletFeed shows the Webhook screen. If you do not have WalletFeed Pro, WalletFeed shows WalletFeed Pro first.
-
If WalletFeed shows WalletFeed Pro, get WalletFeed Pro.
-
To give the destination a different name, for example n8n, type the name in Name.
-
Paste the URL in the field that shows
https://example.com/hook.If the URL does not start with
https://, you cannot tap Send Test or Add. -
If you use n8n, paste the header value in Authorization (Optional).
-
If you use your server, and it examines the
Authorizationheader, type the value for that header in Authorization (Optional). -
If the server does not examine the signature (for example, n8n with Header Auth), go to step 14.
-
Tap Share Signing Secret.
Result: iOS shows a menu with Copy. The secret starts with
whsec_. -
Tap Copy.
-
Add the secret to your server.
-
Tap Send Test.
Result: WalletFeed sends one test transaction of $4.20 from the merchant WalletFeed. If the server accepts it, WalletFeed shows a green checkmark.
If the server does not accept it, WalletFeed shows the error below Send Test. In n8n, the Executions tab of the workflow shows the test.
-
Tap Add.
Result: WalletFeed shows Send Transactions to Your Server? with a message. The message tells you the data that your server will receive. The message also gives the Wallet accounts and the start date, or "including earlier ones" if Initial History is All.
If you tap Cancel, WalletFeed removes the new destination and does not send data.
-
Tap Send.
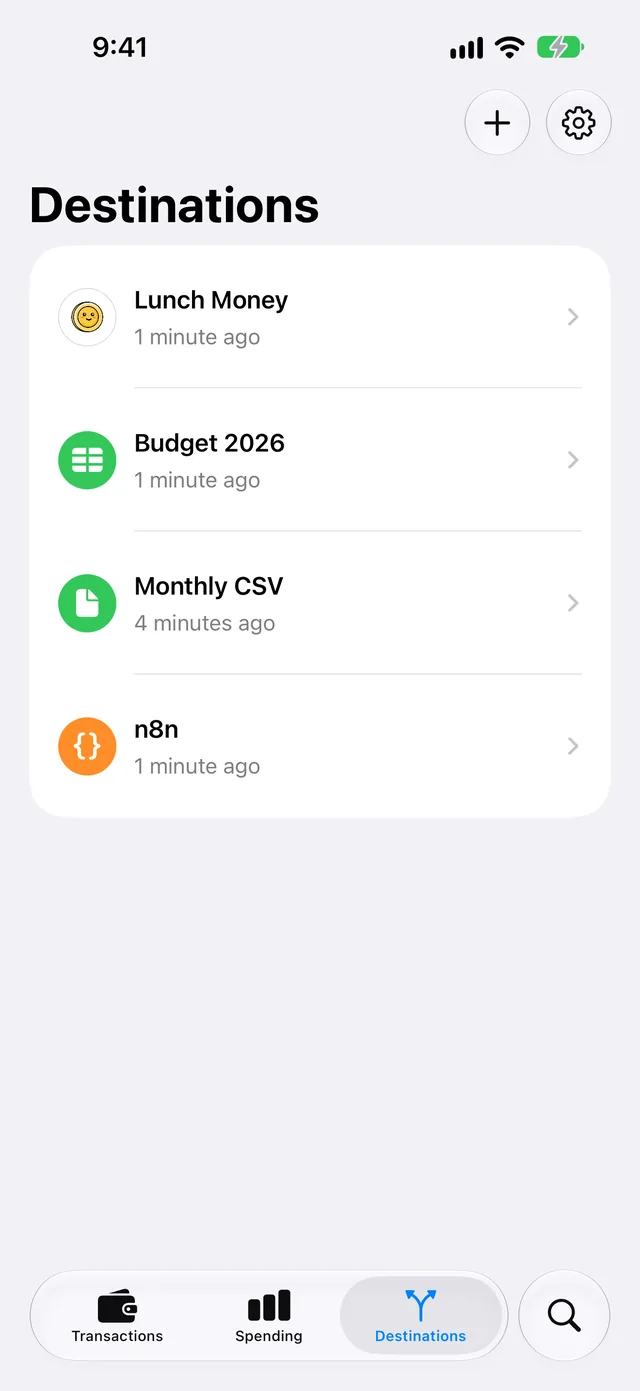
Result: WalletFeed starts to send transactions to the URL.
Data that the webhook receives
WalletFeed sends each change to the URL in an HTTP POST request with a JSON body. One request contains a maximum of 100 transactions. The body has these items:
typeistransactions.changed. For Send Test, the value iswalletfeed.test.timestampis the date and time when WalletFeed sent the request.data.upsertedis a list of the new and changed transactions.data.deletedIDsis a list of the IDs of the transactions to remove.
WalletFeed sends the IDs to remove in one request, and the new and changed transactions in a different request. Thus, in each request, one of the two lists is empty.
This table shows the fields of each transaction in data.upserted.
| WalletFeed sends | JSON field |
|---|---|
| Transaction ID, which stays the same when the transaction changes | id |
| ID and name of the Wallet account, for example Apple Card | accountID, accountName |
liability for Apple Card, or asset for Apple Cash and Savings |
accountType |
| Date and time of the transaction | date |
| Date and time when the charge posted, if Wallet gives it | postedDate |
| Amount (a positive number) | amount |
debit for purchases and fees, or credit for refunds, payments and deposits |
direction |
Currency code, for example USD |
currencyCode |
| Amount and currency of a purchase in a different currency | foreignAmount, foreignCurrencyCode |
| Description from Wallet | description |
| Description from the card network | originalDescription |
| Merchant name, if Wallet has it | merchantName |
| Merchant category code (MCC), if Wallet has it | merchantCategoryCode |
WalletFeed category, for example dining or groceries |
category |
Wallet status: authorized, pending, booked or memo |
status |
Transaction type from Wallet, for example pointOfSale, refund, billPayment or transfer |
type |
If Wallet has no value for a field, the transaction does not include that field. The dates use the ISO 8601 format and UTC, for example 2026-10-30T06:29:40Z.
Each request also has the Standard Webhooks headers webhook-id, webhook-timestamp and webhook-signature. The User-Agent header is WalletFeed-Webhooks/1. If you typed a value in Authorization, the request has that value in the Authorization header.
WalletFeed has no account and no WalletFeed servers. Thus, your iPhone sends the data to the URL. The Keychain on your iPhone keeps the URL, the Authorization value and the secret. The server or service that receives the data keeps it. The terms of that service are applicable to the data.
Get one item for each transaction in n8n
The Webhook node puts the JSON in body. To get one n8n item for each transaction, do these steps:
- After the Webhook node, add a Split Out node.
- In Fields To Split Out, type
body.data.upserted. - Click Publish.
- In the window, click Publish.
The IDs of the transactions to remove are in body.data.deletedIDs.
The request from Send Test also starts the workflow. In that request, body.type is walletfeed.test.
New and changed transactions
While WalletFeed is open, the webhook receives changes in seconds. When WalletFeed is not open, iOS starts WalletFeed approximately 1 hour or less after a change in Wallet. If Background Sync is on in Settings › Sync, WalletFeed then sends the change.
In Wallet, a new charge is pending until the charge posts. WalletFeed sends the charge with pending or authorized in status. When the charge posts, WalletFeed sends the same id again with booked in status and the posted amount. To keep one item for each transaction, you must change the item that has the same id. If Wallet gives the posted charge a new ID, WalletFeed sends the previous ID in deletedIDs and the new transaction in upserted.
If Include Pending is off in the filter, WalletFeed sends charges only after they post. Send only some transactions tells you how to set the filter.
A refund is a different transaction. Its direction is credit.
If Wallet shows a declined or expired charge, or removes a transaction, WalletFeed sends the ID of that transaction in deletedIDs.
If the server does not send a status code from 200 to 299, WalletFeed keeps the changes. WalletFeed sends them again each time that it sends data, until the server accepts them. Thus, the server can receive the same data two times or more. Two requests with the same data have the same webhook-id. The webhook-timestamp header, the timestamp value and the signature are different in each request.
Send previous transactions
A new destination also receives previous transactions from the start date in Settings › Sync › Initial History. Initial History is All until you change it. To start from a different date, you must set Initial History before you add the webhook.
To send more previous transactions after you add the webhook, use Send History:
-
In Destinations, tap the webhook destination.
-
Tap Send History.
-
Tap 30 Days, 90 Days, 1 Year or All.
Result: WalletFeed shows Sending History and a progress bar.
WalletFeed uses transactions.changed requests for previous transactions, and it sends the newest transactions first. It sends them in groups of approximately 500 and waits 1 second between groups. Each request contains a maximum of 100 transactions. n8n starts the workflow one time for each request.
To stop Send History, do these steps:
- In the destination, tap Send History.
- Tap Stop Sending.
Change or remove the destination
Send only some transactions
- In Destinations, tap the webhook destination.
- Set Filter to on.
- Set the filter controls (refer to the table).
| Control | WalletFeed sends |
|---|---|
| Include | All transactions, only purchases or only credits |
| Minimum | Only transactions of this amount or more |
| Include Pending | If it is off, charges only after they post |
| Accounts | Only transactions from the Wallet accounts that you select |
| Categories | Only transactions in the categories that you select |
| Exclude | No transactions from the merchants that you type (with a comma between two merchants) |
If Apple Intelligence is active, you can also type a rule, for example "Travel over $50, not Uber". When you tap the Apple Intelligence icon at the end of the field, WalletFeed makes the filter from the rule. For more information about the filter, refer to Choose what to send.
WalletFeed uses the filter only for the transactions that it sends after you set the filter.
Change the URL
-
In Destinations, tap the webhook destination.
-
Tap URL.
Result: WalletFeed shows Webhook URL with the URL that the destination uses.
-
Delete the URL in the field.
-
Paste the new URL.
If the URL does not start with
https://, you cannot tap Save. -
Tap Save.
Result: WalletFeed starts to send changes to the new URL.
The URL row shows only the server name from the URL. WalletFeed does not send the previous transactions to the new URL. You can send them with Send History.
Change the Authorization value
- In Destinations, tap the webhook destination.
- Tap Authorization.
- Delete the value in the field.
- Type or paste the new value.
- Tap Save.
If the field is empty when you tap Save, the destination has no value, and Authorization shows None.
You can get the secret again with Share Signing Secret in the destination. The destination always uses the same secret.
Stop or delete the destination
To stop the destination for a time, set Enabled to off in the destination.
To delete the destination, do these steps:
- In Destinations, tap the webhook destination.
- Tap Delete.
- Tap Delete again.
The transactions that WalletFeed sent stay on your server or in n8n.
To stop the n8n workflow, do these steps in n8n:
- Open the menu adjacent to Publish.
- Select Unpublish.
If there is a problem
If you cannot tap Send Test or Add
Send Test and Add operate only if the URL starts with https:// and has a server name. For Add, a name is also necessary.
- Make sure that the URL starts with
https://and has a server name after it. - Make sure that Name is not empty.
If WalletFeed shows "Rejected (HTTP 404)"
The server has no webhook at the URL. For example, the URL is the n8n Test URL, you did not publish the workflow, or HTTP Method is not POST. For this problem, Send Test on the Webhook screen shows "The server returned an error (HTTP 404)."
- In the n8n Webhook node, make sure that HTTP Method is POST.
- Make sure that you published the workflow after your last change.
- In the Webhook node, select Production URL.
- Copy the URL again.
- In WalletFeed, do the steps in Change the URL.
- In the destination, tap Send Test.
- If WalletFeed shows "Rejected (HTTP 404). Check the destination, then try again." below Sending History, tap Try Again.
If the HTTP code is not 404, the server did not accept the request because of a different problem. To find the problem, examine the log of your server, or the Executions tab in n8n.
If the destination shows "Authentication failed"
The server did not accept the Authorization value (HTTP 401 or 403). In n8n, this problem occurs if the value is different from Value in the Header Auth credential.
-
In Destinations, tap the destination.
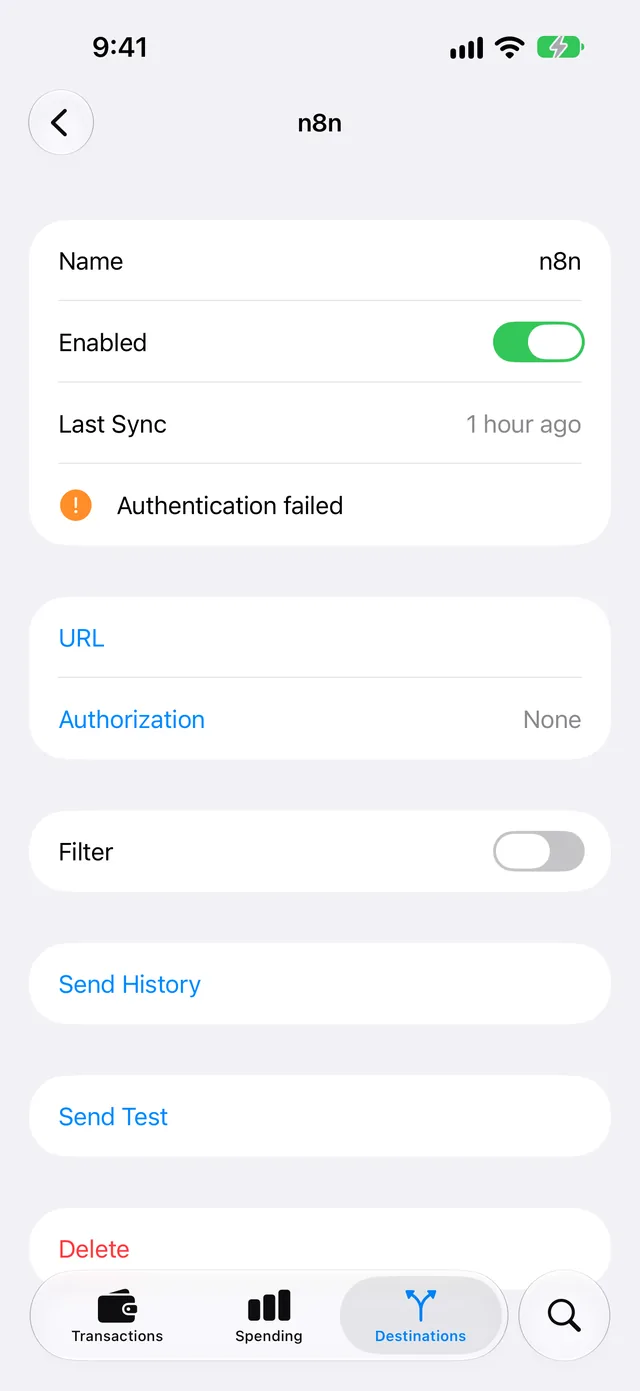
-
Tap Authorization.
-
Delete the value in the field.
-
Type the header value from Value in n8n.
-
Tap Save.
-
If WalletFeed shows "Authentication failed. Check the connection." below Sending History, tap Try Again.
If the destination shows "Can't connect"
Your iPhone cannot connect to the URL, or the server did not send a status code in 30 seconds. For example, the server is off, or the URL operates only on your home network.
-
Make sure that your server or n8n is on.
-
On your iPhone, set Wi-Fi to off.
-
In the destination, tap Send Test.
If WalletFeed shows an error, the URL operates only on your home network. You must use a URL that operates from the internet.
-
Set Wi-Fi to on again.
-
In n8n, make sure that Respond is Immediately.
WalletFeed sends the changes again each time that it sends data, until the server accepts them.
If the destination shows "Server error"
The server sent a status code of 500 or more. The destination shows the code, for example "Server error (500)". WalletFeed sends the same changes again each time that it sends data, until the server accepts them.
- Examine the log of your server, or the Executions tab of the workflow in n8n.
- Correct the error.
- In the destination, tap Send Test.
If the server receives a transaction two times
WalletFeed sends a transaction again when the transaction changes, for example when a pending charge posts. WalletFeed also sends a request again if it did not get a status code from 200 to 299.
- Find the item that has the
idof the transaction. - Change that item. Do not add a new item.
- To find a request that the server received two times, compare the
webhook-idheaders.
If the webhook does not receive new transactions
Something stops the transactions to the URL. For example, the destination is off, or Background Sync is off. After your iPhone starts again, WalletFeed cannot send data to destinations until you type your passcode one time.
- Open WalletFeed. While WalletFeed is open, it sends changes in seconds.
- If Destinations shows Sync Requires Pro, tap Upgrade.
- If the destination shows Off, set Enabled to on in the destination.
- If Filter is on, make sure that the filter includes the transaction.
- In n8n, make sure that you published the workflow.
- In WalletFeed, tap Settings (the gear button) at the top of Destinations.
- Make sure that Background Sync is on.
- Tap Sync Now.
To make sure that WalletFeed can send data to the URL, tap Send Test in the destination. If the server accepts the test transaction, WalletFeed shows a green checkmark.
Related
Updated October 30, 2026