 WalletFeed
Filter the transactions for a destination
A filter selects the Apple Card, Apple Cash and Savings transactions that a destination receives from WalletFeed. If a destination has no filter, it receives all the transactions of the Wallet accounts that WalletFeed reads.
You can set a filter for each destination. For example, you can send your Apple Card transactions to one file and your Apple Cash transactions to a different file. After you add a destination, you set its filter on the screen of the destination.
To add a destination, you must have WalletFeed Pro. WalletFeed Pro is a subscription with a 1-week free trial, or a one-time Lifetime purchase. Destinations tells you how to add a destination.
Set a filter for a destination
-
On your iPhone, open WalletFeed.
-
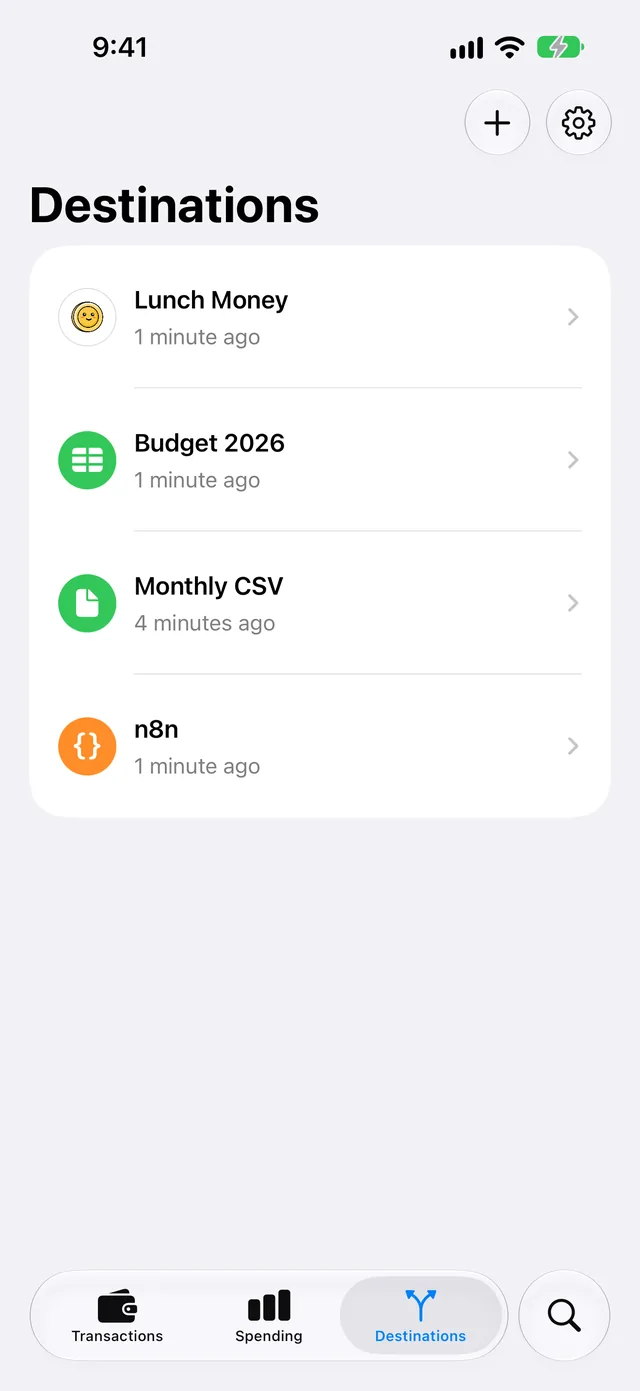
Tap Destinations at the bottom of the screen.
-
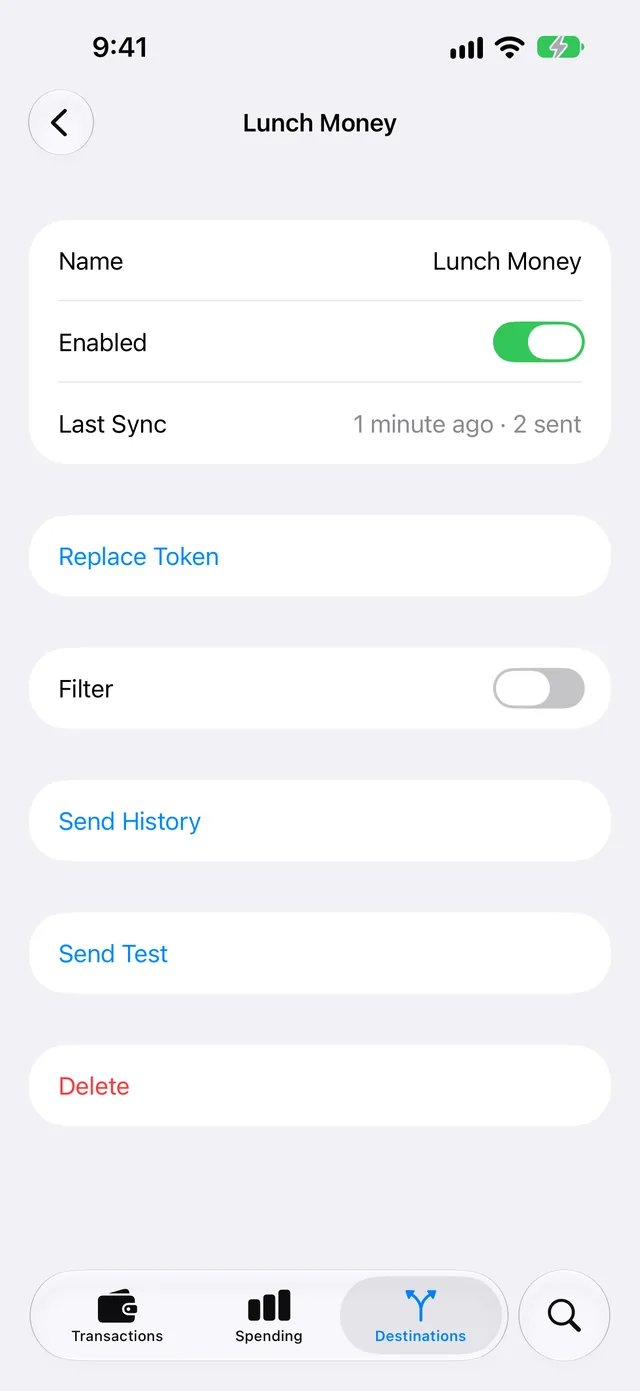
Tap the destination.
-
Set the Filter switch to on.
Below the switch, WalletFeed shows the filter controls: Include, Minimum, Include Pending, Accounts, Categories and Exclude.
A destination receives a transaction only if all the filter controls include it. Until you change a control, the filter includes all transactions.
WalletFeed saves the filter each time that you change a control. When you change the filter, WalletFeed does not remove the transactions that the destination received.
Send only purchases or only credits
-
On the screen of the destination, tap Include.
-
Tap Purchases or Credits.
If you tap Purchases, the destination receives purchases and fees. If you tap Credits, the destination receives credits, for example refunds and payments.
To send all transactions again, select All in Include.
Set a minimum amount
-
On the screen of the destination, tap None in the Minimum row.
-
Type the amount, for example 50.
The destination receives only transactions of $50 or more.
WalletFeed uses the minimum for purchases and for credits. For example, a destination with a minimum of 50 does not receive a refund of $20.
To remove the minimum, delete the number in the Minimum row.
Send charges only after they post
A pending charge can change before it posts.
-
On the screen of the destination, set the Include Pending switch to off.
The destination receives each charge only after the charge posts.
OFX and QIF files include a charge only after it posts. The Include Pending switch does not change this.
Select the accounts
-
On the screen of the destination, tap Accounts.
The Accounts screen shows the Wallet accounts that WalletFeed reads.
-
Tap each account to send its transactions to the destination.
The Accounts screen shows a checkmark on the row of each account that you select.
-
Tap the back button at the top of the screen.
The Accounts row shows the number of accounts that you selected.
To send the transactions of all the accounts again, tap All at the top of the Accounts screen.
Select the categories
WalletFeed sets the category of each transaction from its merchant category code (MCC). The categories are Groceries, Dining, Transport, Fuel, Travel, Shopping, Entertainment, Subscriptions, Utilities, Health, Services, Cash & Transfers and Other.
-
On the screen of the destination, tap Categories.
-
Tap each category to send its transactions to the destination.
The Categories screen shows a checkmark on the row of each category that you select.
-
Tap the back button at the top of the screen.
The Categories row shows the number of categories that you selected.
To send the transactions of all the categories again, tap All at the top of the Categories screen.
Send no transactions from some merchants
-
On the screen of the destination, tap Merchants in the Exclude row.
-
Type the merchant names, with a comma between the names, for example
Uber, Starbucks.The destination does not receive transactions from these merchants.
If the merchant name or the description of a transaction contains one of the names that you typed, the destination does not receive the transaction. You can type part of a name. For example, if you type uber, the destination does not receive transactions from Uber or Uber Eats. Uppercase and lowercase letters give the same result.
Make a filter with Apple Intelligence
With Apple Intelligence, you can make a filter from a sentence. WalletFeed shows the text field for Apple Intelligence only if your iPhone can use Apple Intelligence and Apple Intelligence is active.
-
On the screen of the destination, set the Filter switch to on.
-
Tap the text field below Filter.
Until you type, the field shows the example "Travel over $50, not Uber".
-
Type a sentence about the transactions to send to the destination, for example
Dining over $20, not Starbucks. -
Tap the Apple Intelligence icon at the end of the field.
Apple Intelligence sets the filter controls from your sentence.
-
Examine the controls below the field.
-
If the value of a control is not correct, change the value.
When Apple Intelligence sets the controls, it does not keep the values that you set previously. But the accounts that you selected do not change. The Minimum and Exclude controls get only the amounts and merchant names that are in your sentence.
Apple Intelligence makes the filter on your iPhone from your sentence. It does not get your transactions.
Send previous transactions with the filter
With Send History, you can send previous transactions to the destination.
-
On the screen of the destination, tap Send History.
-
Tap 30 Days, 90 Days, 1 Year or All.
-
If WalletFeed shows a message, tap Send.
The destination receives the transactions from that period that the filter includes.
Filter the history of a new destination
Before a new destination receives transactions, WalletFeed shows a message. The message tells you the accounts and the start date of the transactions that the destination will receive. A new destination has no filter. Thus, the message shows all the Wallet accounts that WalletFeed reads.
When you tap Send (Save for a Files destination), the destination starts to receive transactions from the start date in Initial History. Until you change Initial History, it is All. A new Zapier, Make or Linear destination receives a maximum of 30 days of previous transactions.
To set the filter before a new destination receives previous transactions, set Initial History to Today before you add the destination.
-
In WalletFeed, tap Destinations at the bottom of the screen.
-
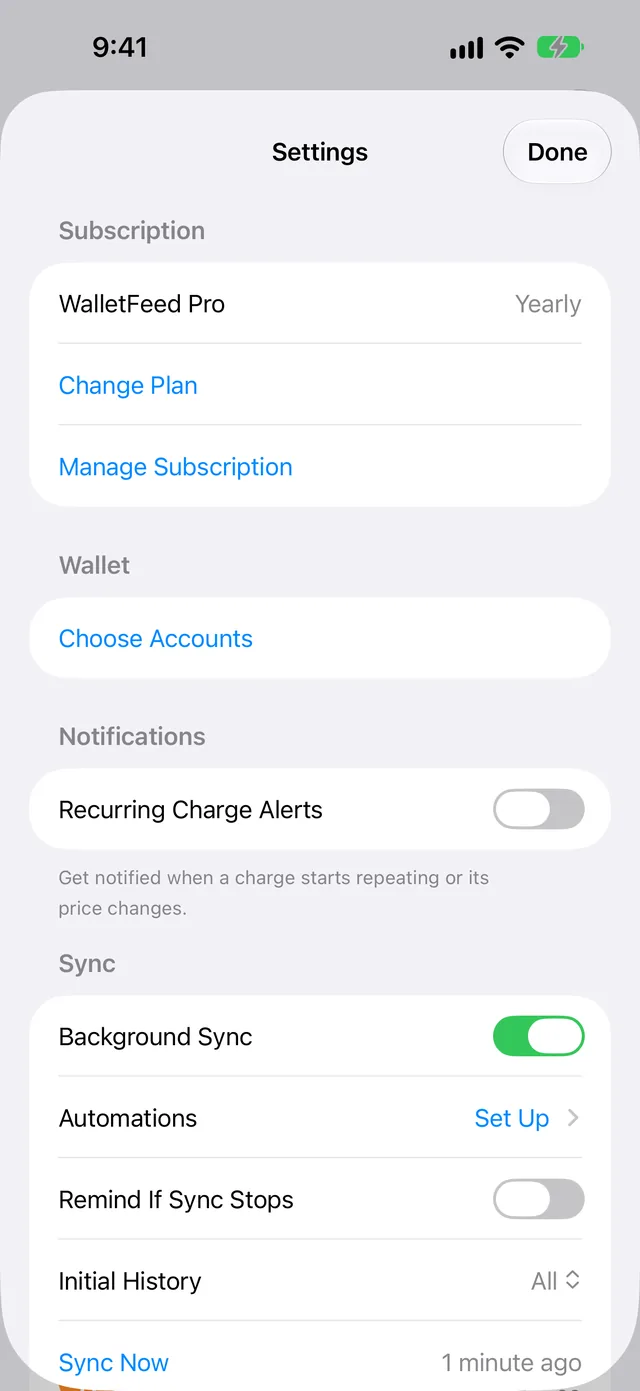
Tap Settings (the gear button) at the top of the screen.
-
In the Sync section, tap Initial History.
-
Tap Today.
-
Tap Done.
-
Add the destination. Refer to Destinations.
-
In the message from WalletFeed, tap Send (Save for a Files destination).
-
Set the filter. Refer to Set a filter for a destination.
-
Tap Send History.
-
Tap 30 Days, 90 Days, 1 Year or All.
-
If WalletFeed shows a message, tap Send.
The destination receives the previous transactions that the filter includes.
Initial History stays at Today for the destinations that you add after this procedure.
Remove the filter
-
On the screen of the destination, set the Filter switch to off.
The destination receives all transactions again. WalletFeed removes the values of all the filter controls.
If you set the Filter switch to on again, you must set each control again.
To send the previous transactions that the filter did not include, use Send History.
If there is a problem
If WalletFeed shows "Couldn't create a rule. Try describing it another way."
Apple Intelligence cannot make a filter from your sentence.
- Change the sentence in the text field.
- Tap the Apple Intelligence icon again.
- If WalletFeed shows the message again, set the controls below the field yourself.
If WalletFeed does not show the text field for Apple Intelligence
The Filter switch is off, your iPhone cannot use Apple Intelligence, or Apple Intelligence is not active. You can set the filter without Apple Intelligence.
- On the screen of the destination, set the Filter switch to on.
- If WalletFeed does not show the field, make sure that your iPhone model is on the list in Get started with the next generation of Apple Intelligence.
- Open the Settings app.
- Tap Apple Intelligence & Siri.
- Activate Apple Intelligence.
- Open WalletFeed again.
- In Destinations, tap the destination.
If a destination does not receive a transaction
One or more filter controls do not include the transaction. If the transaction is a pending charge and the Include Pending switch is off, the destination receives the charge after it posts.
- In Destinations, tap the destination.
- Examine the filter controls, for example Minimum and Accounts.
- Change the control that does not include the transaction.
- Tap Send History.
- Tap a period that includes the date of the transaction.
- If WalletFeed shows a message, tap Send.
If the filter includes the transaction, find the cause in the guide for the destination. Refer to Destination types.
If a destination has transactions that the filter does not include
WalletFeed sent these transactions before you set the filter. When you change the filter, WalletFeed does not remove them.
- Open the service or the file that receives the transactions, for example your spreadsheet or your budget app.
- Remove the transactions that the filter does not include.
Related
Updated October 30, 2026