 WalletFeed
Destinations
A destination is an app, a spreadsheet, a file or a server that receives your Apple Card, Apple Cash and Savings transactions from WalletFeed. After you add a destination, WalletFeed sends new transactions and changes to transactions from your iPhone to the destination.
To send transactions to a destination, you must have WalletFeed Pro. WalletFeed Pro is a subscription with a 1-week free trial, or a one-time Lifetime purchase. Without WalletFeed Pro, you can look at the list of destination types.
Destination types
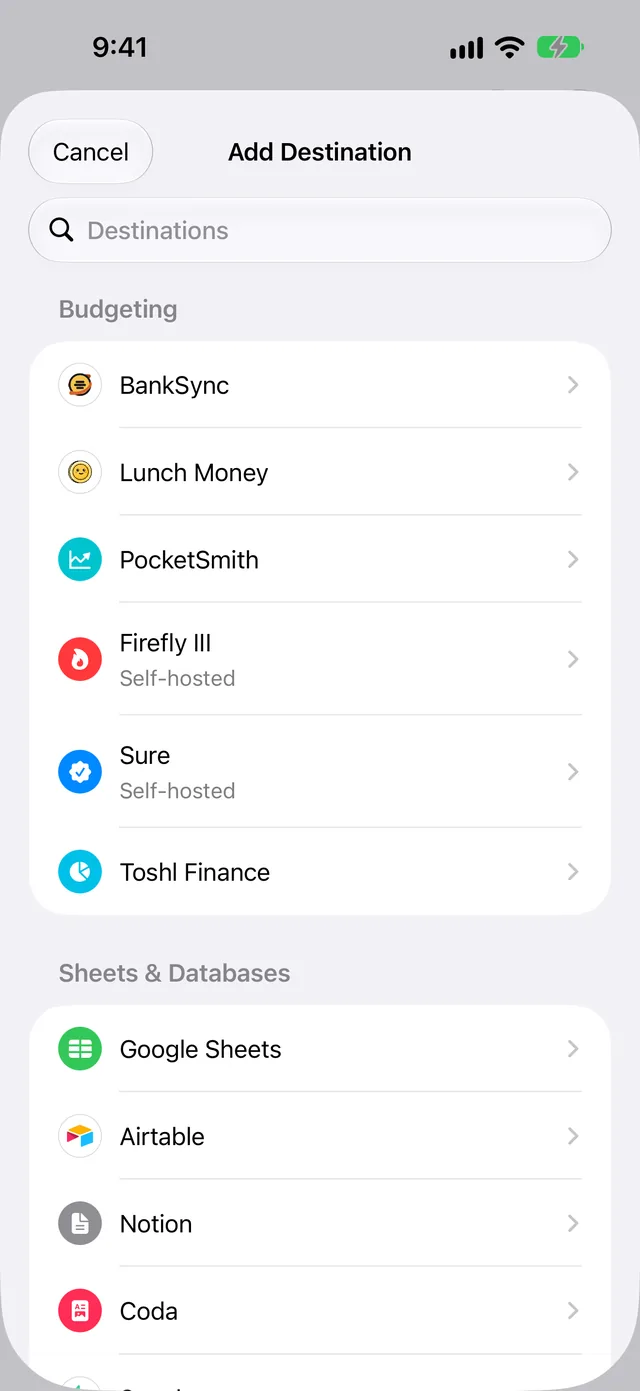
Each destination type has a guide with all the steps. Add Destination shows the destination types in these sections:
| Section | Destinations |
|---|---|
| Budgeting | BankSync, Lunch Money, PocketSmith, Firefly III, Sure, Toshl Finance |
| Sheets & Databases | Google Sheets, Airtable, Notion, Coda, Supabase, Linear |
| Automations | Zapier, Make |
| Files | CSV File, OFX File, QIF File |
| Developers | AWS (Amazon S3, Amazon SQS, Kinesis Data Streams, DynamoDB and EventBridge), Webhook |
Add Destination shows one row for Files and one row for AWS. In the setup form, you select the file format in Format, or the AWS service in Service.
OFX and QIF files do not include pending charges.
The rows for Firefly III and Sure show Self-hosted. You install these apps on a server.
You can add more than one destination of the same type. For example, you can send the transactions of each Wallet account to a different CSV file.
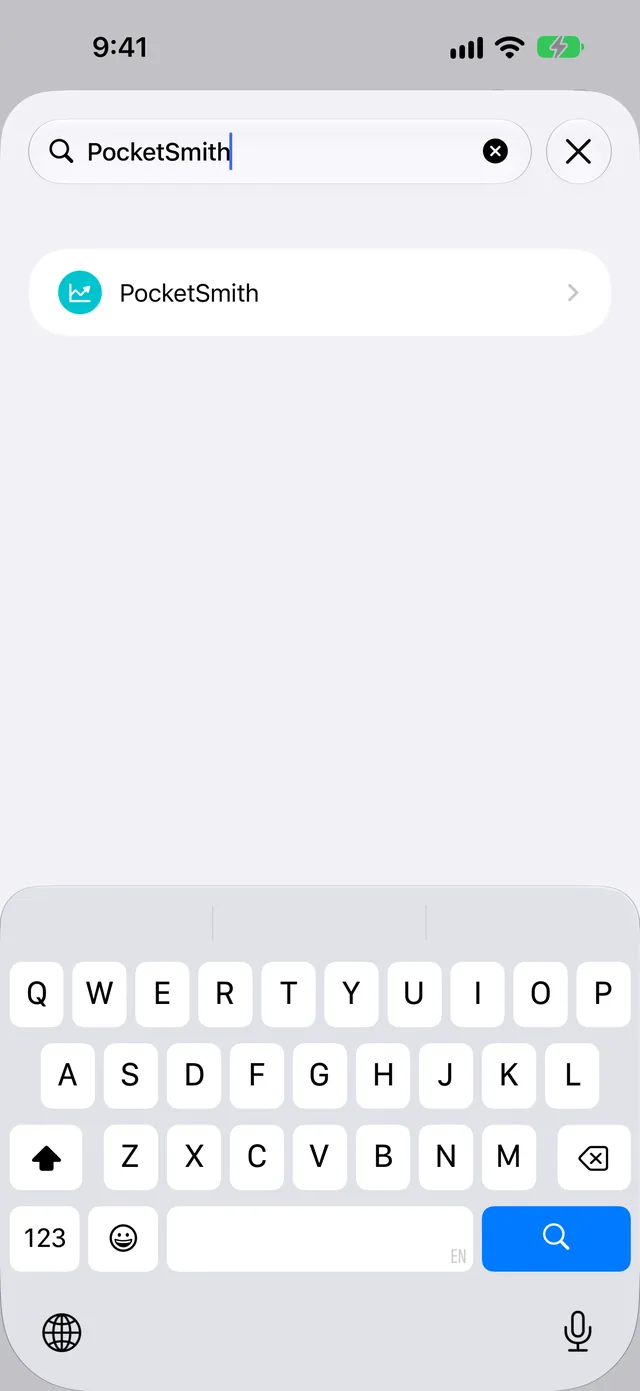
To find a destination, type its name in the search field at the top of Add Destination. To open Add Destination, tap + in Destinations.
The search also finds a file format from the name of an app that uses the format. For example, "GnuCash" finds OFX File and QIF File.
Add a destination
-
On your iPhone, open WalletFeed.
-
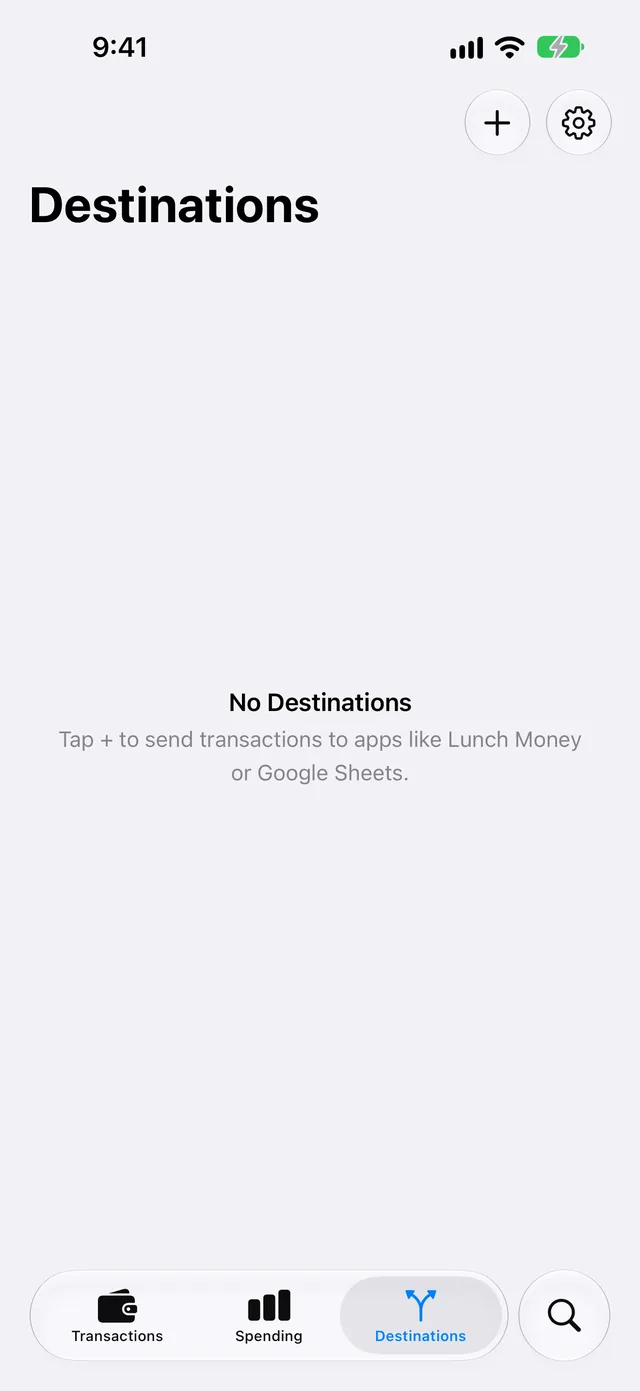
Tap Destinations at the bottom of the screen.
-
Tap + at the top of the screen.
-
Tap the destination type, for example Lunch Money.
If you do not have WalletFeed Pro, the WalletFeed Pro screen opens. After you get WalletFeed Pro or tap Restore Purchases, the setup form opens.
-
Do the steps in the setup form.
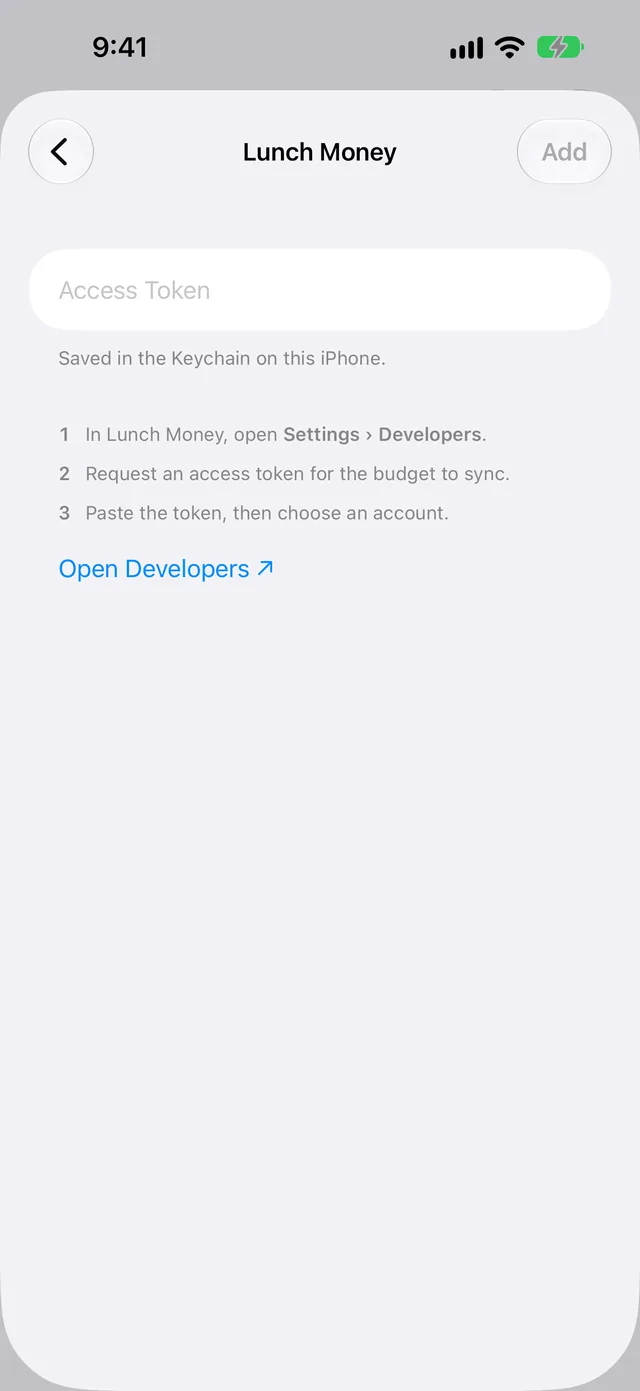
The form shows the steps below its fields. The guide for each destination type gives all the steps.
-
Tap Add at the top of the screen.
Result: WalletFeed shows a message, for example Send Transactions to Lunch Money?
The message tells you which data the destination receives and from which Wallet accounts. It also gives the start date. If the destination receives all previous transactions, the message shows "including earlier ones".
-
Tap Send (or Save for a Files destination).
Result: WalletFeed closes Add Destination and starts to send transactions to the destination.
If you tap Cancel in the message, WalletFeed removes the destination and does not send transactions to it. The setup form stays open. You can change the text in the fields and tap Add again. If you close Add Destination before you tap Send or Save, WalletFeed also removes the destination.
A new destination also receives previous transactions from the start date in Settings › Sync › Initial History. Initial History is All until you change it. A new Zapier, Make or Linear destination receives a maximum of 30 days of previous transactions. After you add the destination, you can send more previous transactions with Send History.
The service keeps the data that it receives. After a service receives your transactions, the terms of that service are applicable to them.
Destination status
Destinations shows each destination with its status below its name.
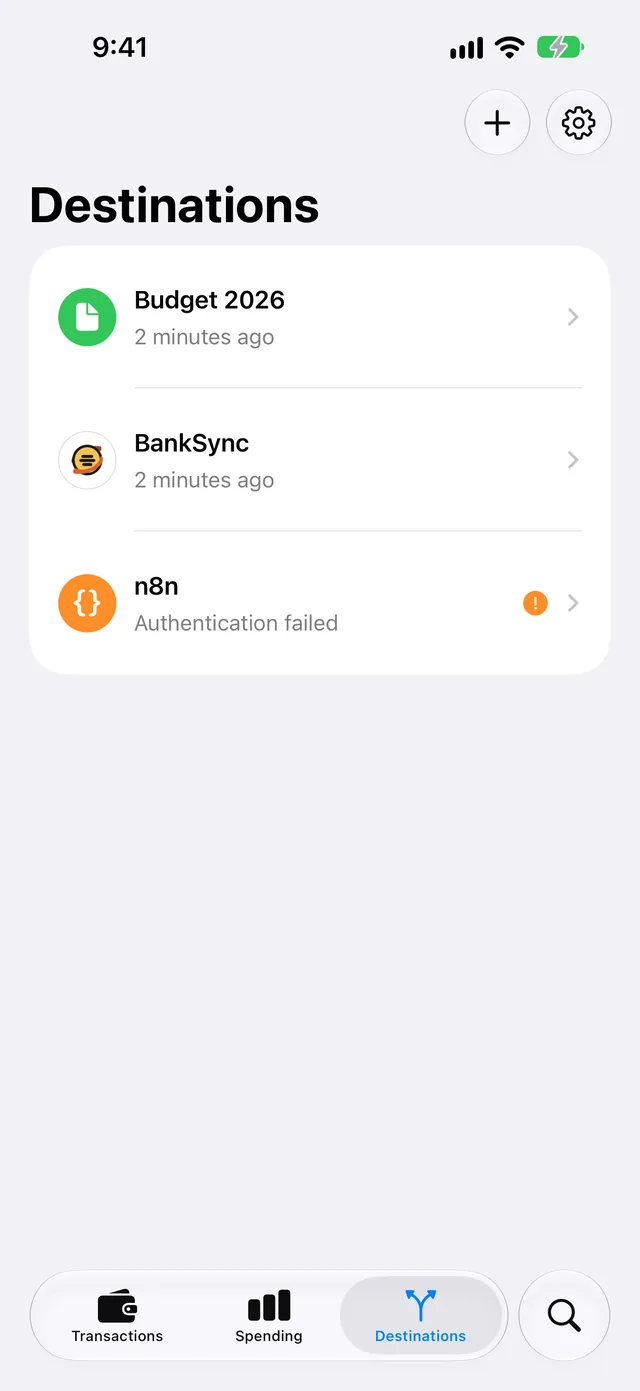
These are the usual statuses:
| Status | Information |
|---|---|
| A time, for example "2 minutes ago" | The time of the last update to the destination. |
| "Sending history · 46%" | WalletFeed sends previous transactions to the destination. |
| "History paused · 46%" | WalletFeed does not send previous transactions at this time. Refer to Send History. |
| "Off" | Enabled is off. WalletFeed does not send transactions to the destination. |
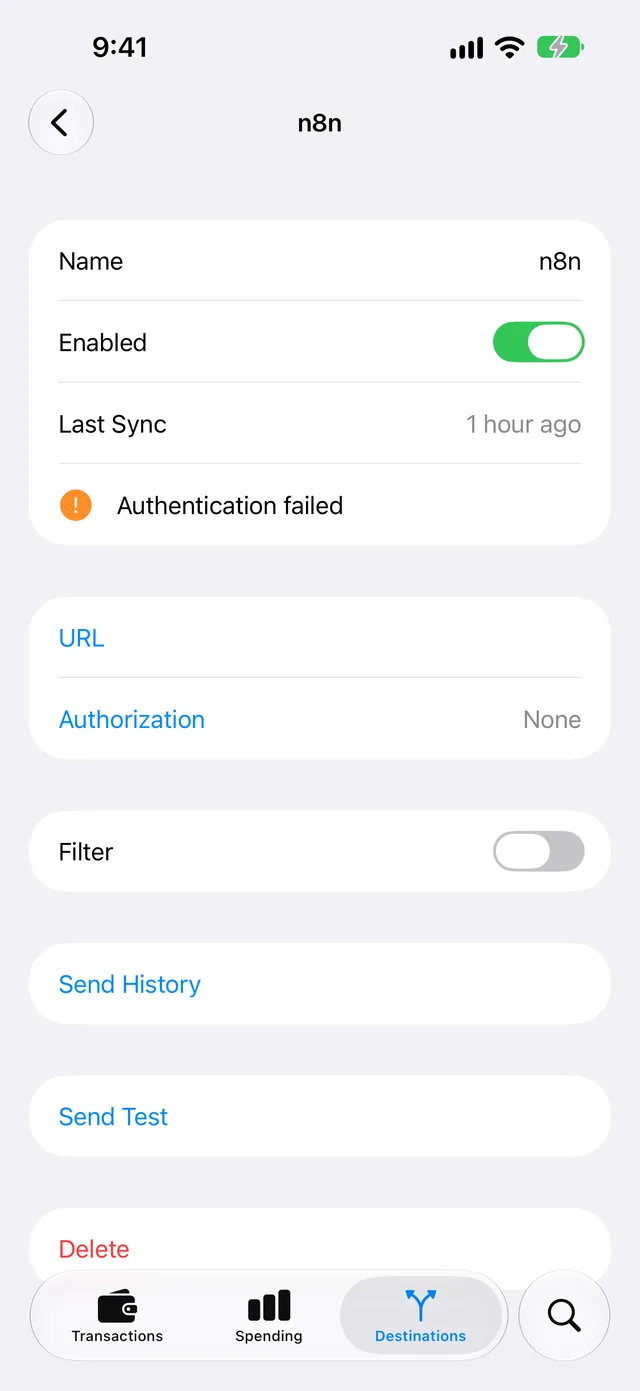
| A failure, for example "Authentication failed" | The last update had a failure. Some failure messages also tell you what to do. The row shows an orange exclamation mark. Refer to If there is a problem. |
Updates to destinations
While WalletFeed is open, a destination receives changes in seconds. When WalletFeed is not open, iOS starts WalletFeed approximately 1 hour or less after a change in Wallet. If Background Sync is on in Settings › Sync, WalletFeed then sends the change.
To update all destinations, swipe down on the list in Destinations. You can also tap Settings › Sync › Sync Now.
Change a destination
To open a destination, tap it in Destinations.
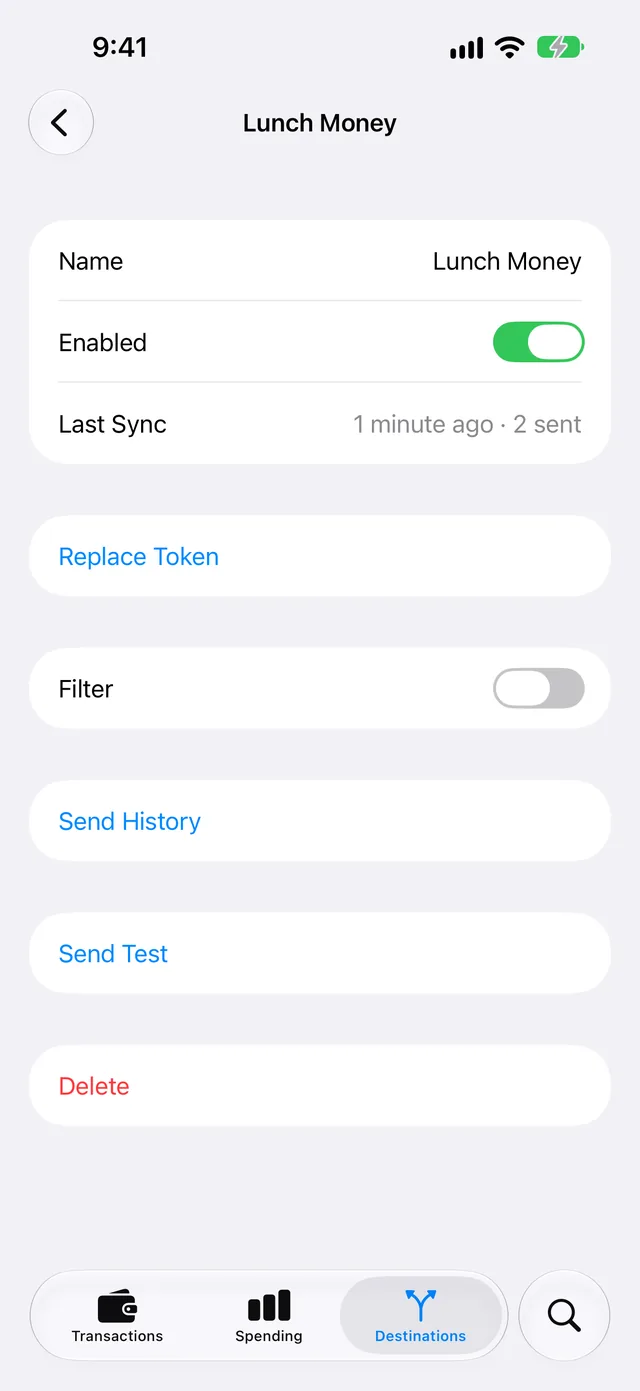
The destination screen has these rows, from top to bottom:
| Rows | Function |
|---|---|
| Name, Enabled and Last Sync | You can change the name, and stop or start the destination. Last Sync shows the time and result of the last update. |
| Replace Key, Replace Token, Replace URL, Sign In Again or Change Folder | You can replace the key, token, URL or folder, or connect the account again. The rows are different for each destination type. |
| Filter | The filter selects the transactions that the destination receives. Refer to Choose what a destination receives. |
| Send History | WalletFeed sends previous transactions to the destination. Refer to Send History. |
| Send Test | WalletFeed sends a test transaction to the destination. |
| Delete | WalletFeed removes the destination. |
If WalletFeed sent transactions in the last update, Last Sync also shows the number of transactions, for example "1 minute ago · 2 sent". If the last update had a failure, the screen shows the failure below Last Sync.
Change the name of a destination
-
In Destinations, tap the destination.
-
Tap the name in the Name row.
-
Type the new name.
Result: Destinations shows the new name.
Stop and start a destination
-
In Destinations, tap the destination.
-
Set Enabled to off.
Result: In Destinations, the destination shows "Off". WalletFeed does not send transactions to it while Enabled is off.
To send transactions to the destination again, set Enabled to on.
Send a test
-
In Destinations, tap the destination.
-
Tap Send Test.
Result: WalletFeed sends one test transaction to the destination. If the destination receives it, the Send Test row shows a green checkmark. If the destination does not receive it, the screen shows the failure below Send Test.
The test transaction has the merchant name WalletFeed and the amount 4.20 USD. For a Files destination, WalletFeed writes a test file in the folder, for example WalletFeed Test.csv. You can delete the test transaction or the test file.
Replace a key or connect again
If you make a new key in the service, you can replace the key in WalletFeed. It is not necessary to remove the destination and add it again.
-
In Destinations, tap the destination.
-
Tap the row for the key, for example Replace Key, Replace Token or Replace URL (for Zapier and Make).
-
Paste the new key or URL in the field.
-
Tap Replace.
Result: WalletFeed validates the new key with the service. If the key is correct, WalletFeed keeps the key and shows a checkmark. If the key is not correct, WalletFeed shows the failure below the row.
For some destinations, do different steps after step 1:
- If the destination screen shows Sign In Again, tap Sign In Again. Then obey the instructions on the page that opens.
- For a Files destination, tap Change Folder. Then select the folder.
- For a Webhook destination, tap URL or Authorization. Type the new text. Then tap Save.
Remove a destination
-
In Destinations, tap the destination.
-
Tap Delete.
Result: WalletFeed shows a message with the name of the destination, for example Delete Lunch Money?
-
Tap Delete.
Result: WalletFeed removes the destination and its key from your iPhone.
The transactions that WalletFeed sent stay in the service. If you made a key in the service for WalletFeed, you can delete that key in the service.
In Destinations, you can also swipe left on a destination and tap Delete. Then WalletFeed removes the destination without a message.
Remove all destinations
-
In WalletFeed, tap Settings (the gear button) at the top of the screen.
-
Scroll to the Data section.
-
Tap Remove All Destinations.
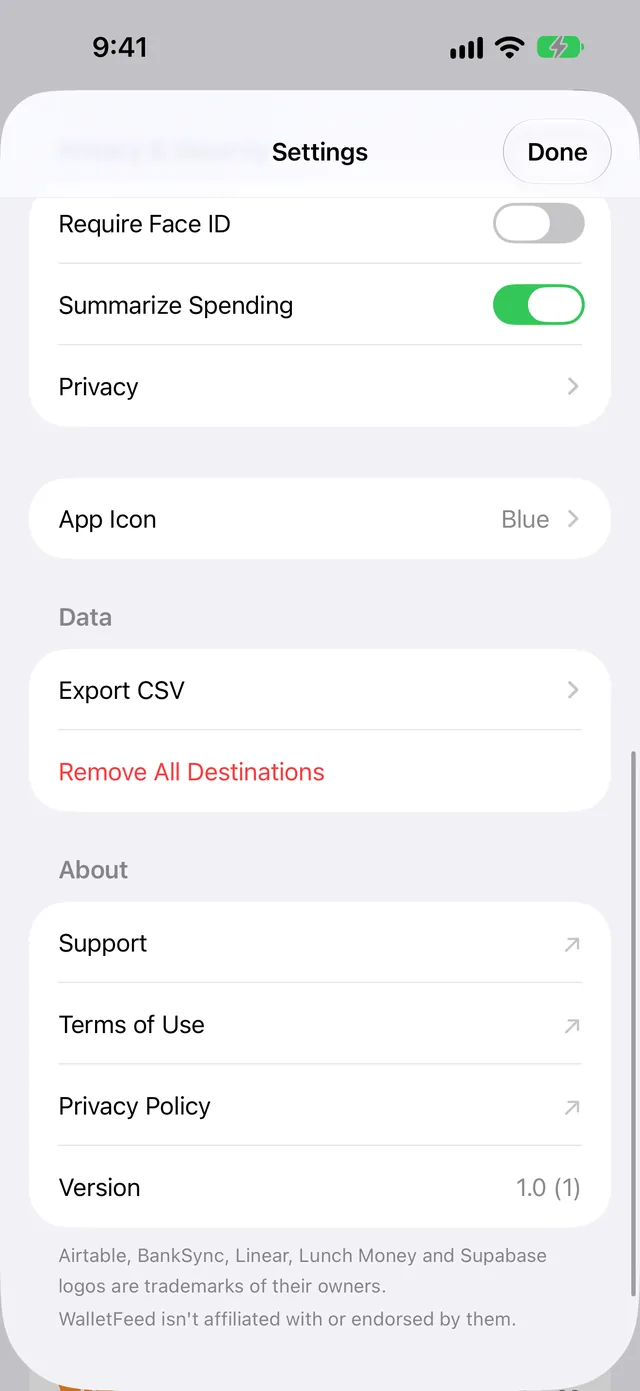
Result: WalletFeed shows the message Remove All Destinations?
-
Tap Remove All.
Result: WalletFeed removes all your destinations. The transactions that WalletFeed sent stay in each service.
If there is a problem
If a destination shows "Authentication failed"
The service does not let WalletFeed use the key or token of the destination. This occurs, for example, if you deleted the key in the service.
-
In Destinations, tap the destination.
-
If the destination uses a key, make a new key in the service.
The guide for the destination type gives the steps.
-
In WalletFeed, do the steps in Replace a key or connect again.
If a destination shows "Can't connect"
WalletFeed cannot connect to the service.
-
Make sure that your iPhone has an internet connection.
-
If the destination is on your server, make sure that the server operates.
-
In Destinations, swipe down on the list.
Result: WalletFeed tries to update the destinations again.
If a destination shows "Server error"
The service has a problem. When WalletFeed updates the destination again, it sends the same changes.
- After some minutes, swipe down on the list in Destinations.
If a destination shows "Off"
WalletFeed does not send transactions to the destination because Enabled is off.
- In Destinations, tap the destination.
- Set Enabled to on.
If Destinations shows "Sync Requires Pro"
Without WalletFeed Pro, WalletFeed does not send transactions to your destinations. Your destinations stay in the list.
-
In Destinations, tap Upgrade.
Result: The WalletFeed Pro screen opens.
-
Select a plan, or tap Restore Purchases.
If a destination receives changes only while WalletFeed is open
Background Sync is off.
- In WalletFeed, tap Settings (the gear button) at the top of the screen.
- In the Sync section, set Background Sync to on.
For more information, refer to Background Sync.
Related
Updated October 30, 2026