 WalletFeed
Send Apple Card transactions to BankSync
WalletFeed sends your Apple Card, Apple Cash and Savings transactions from your iPhone to a table in BankSync. Then your AI agents can read the table through BankSync's MCP tools or its REST API.
Before you start
You must have these items:
- An iPhone with iOS 26 or a newer version. WalletFeed is available only in the US.
- WalletFeed, with access to your Wallet accounts. Refer to Select the Wallet accounts that WalletFeed reads.
- WalletFeed Pro, which is necessary for destinations. WalletFeed Pro is a subscription with a 1-week free trial, or a one-time Lifetime purchase.
- A BankSync account. If you do not have a BankSync account, you can make the account in Step 2.
- Access to your BankSync workspace as the owner or an admin.
- A workspace that can have one more table. On the Free plan, a workspace can have only one table.
- For an API key, BankSync's Standard plan or a higher plan.
Your key stays on your iPhone
- WalletFeed keeps the API key or the sign-in in the Keychain on your iPhone. iOS encrypts the Keychain.
- The API key or the sign-in does not go to iCloud Keychain or to your other devices.
- WalletFeed has no account and no servers. No person at WalletFeed can see or get the API key or the sign-in.
- Your iPhone sends the API key or the sign-in only to BankSync, in each request to BankSync.
- When you delete the destination, WalletFeed deletes the API key or the sign-in from your iPhone. You can also delete the key, or remove WalletFeed, in BankSync.
Step 1: Open BankSync in WalletFeed
-
On your iPhone, open WalletFeed.
-
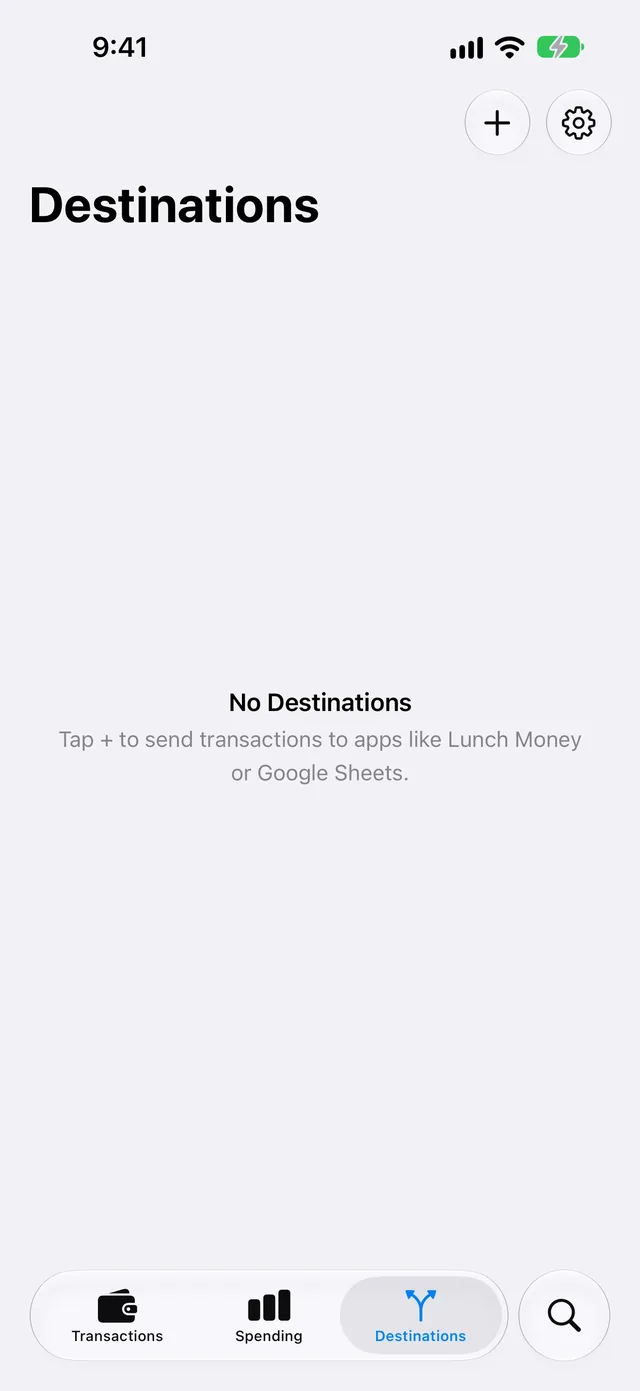
Tap Destinations.
-
Tap + at the top of the screen.
-
In the Budgeting section, tap BankSync.
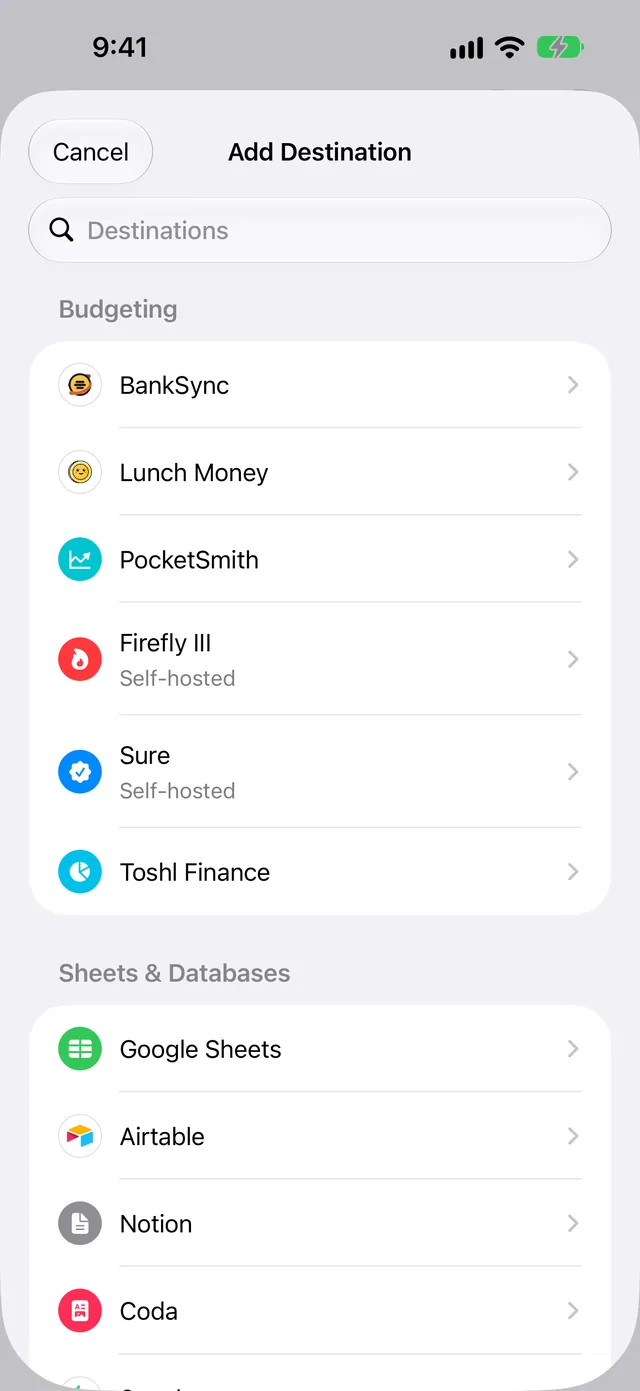
If you do not have WalletFeed Pro, WalletFeed shows the WalletFeed Pro screen before the BankSync form.
Step 2: Connect WalletFeed to BankSync
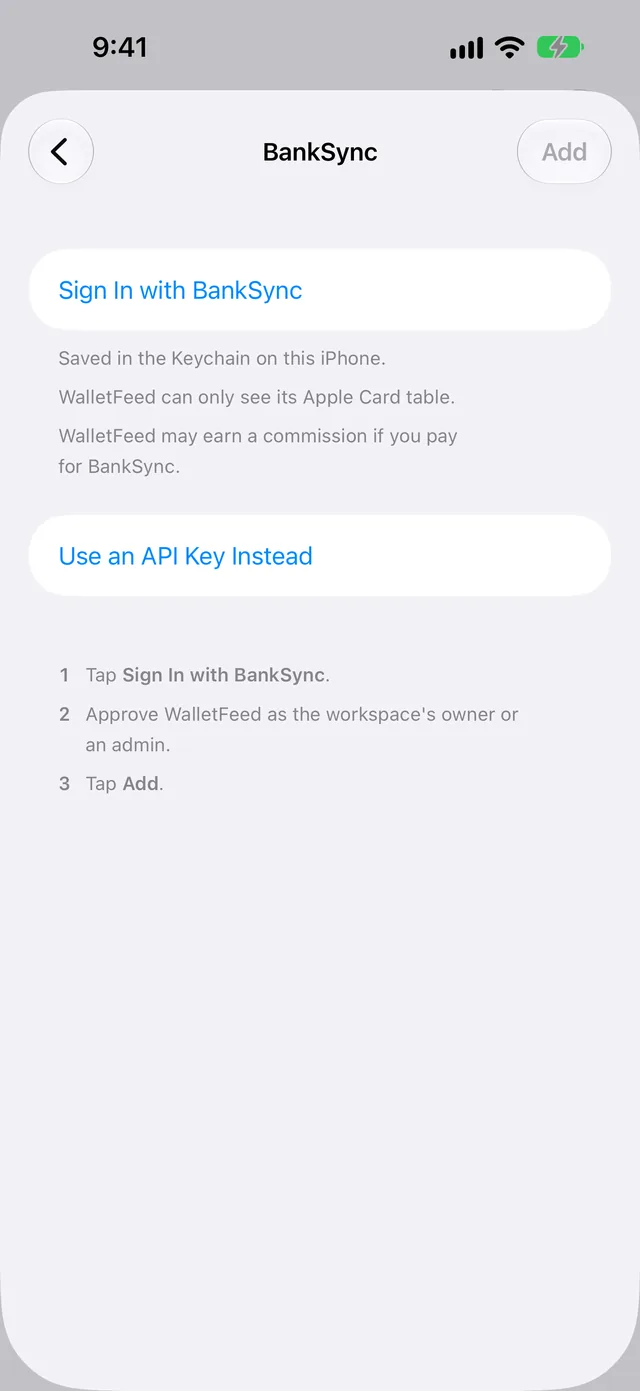
You can use Sign In with BankSync on all BankSync plans, which include the Free plan. With Sign In with BankSync, WalletFeed can get access only to its Apple Card table. To use an API key, refer to Connect with an API key.
The Sign In with BankSync button uses WalletFeed's referral URL. Thus, the form shows the text "WalletFeed may earn a commission if you pay for BankSync."
-
Tap Sign In with BankSync.
-
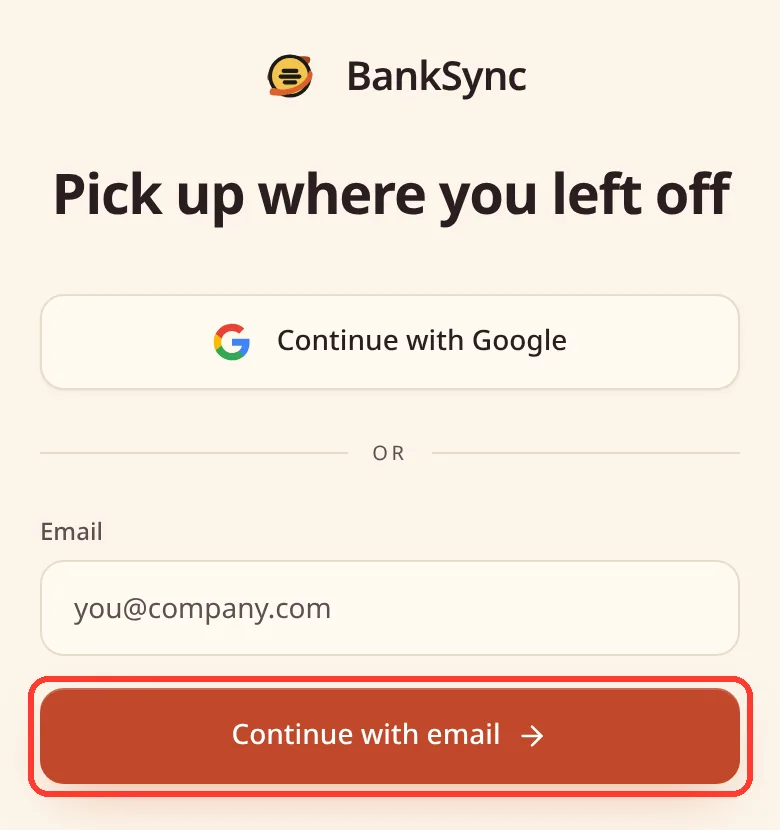
On the BankSync page, tap Continue with Google, or type your e-mail address in Email.
-
If you typed an e-mail address, tap Continue with email.
-
If you have a BankSync account, complete the sign-in.
-
If you typed a new e-mail address, do these steps:
-
Type a password in Password.
-
Type the password again in Confirm password.
-
Tap Create account.
-
In your e-mail app, open the e-mail "Verify your email for BankSync".
-
Tap the hyperlink in the e-mail.
-
Open WalletFeed again.
-
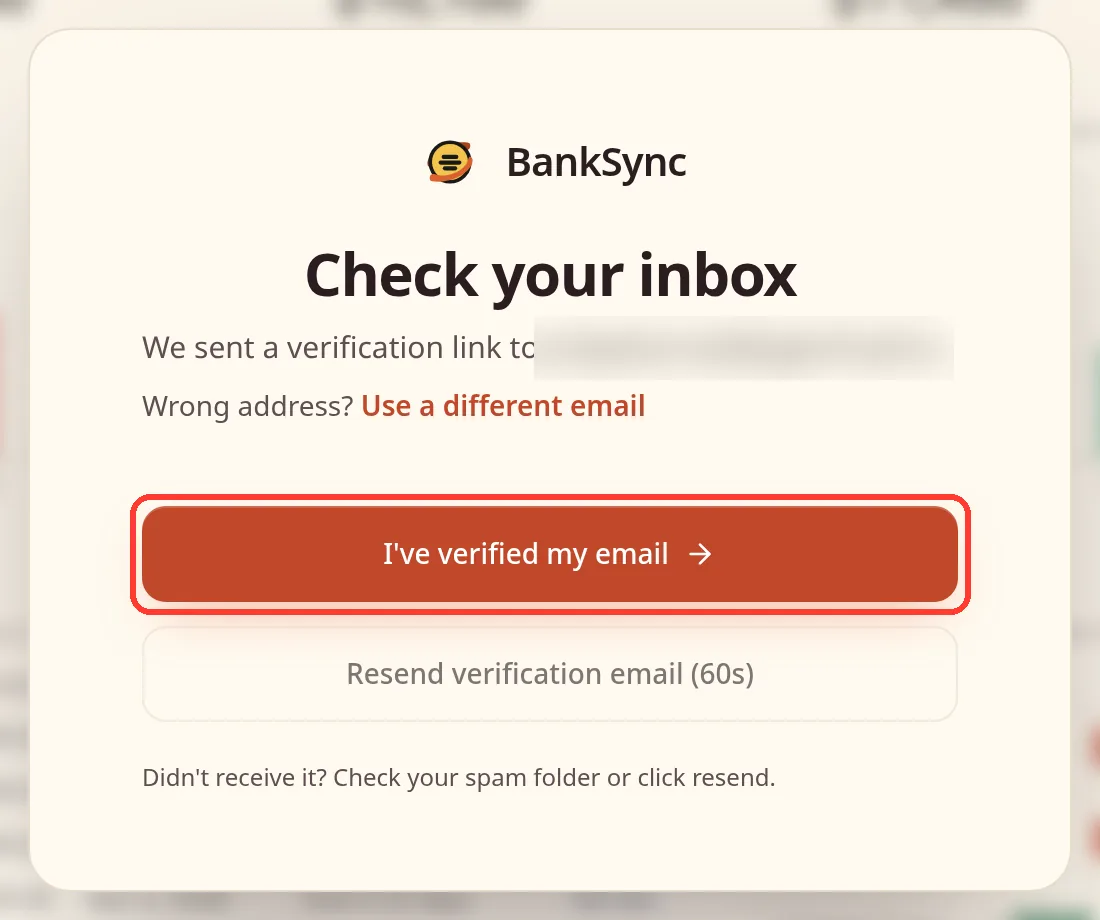
Tap I've verified my email.
-
-
On the BankSync page about WalletFeed, give WalletFeed access to your workspace. Only the owner or an admin of the workspace can do this step.
When you give access, BankSync adds WalletFeed to the workspace and makes the Apple Card table. WalletFeed waits a maximum of approximately 30 seconds for the table. Then the form shows Signed In and your workspace.
-
Tap Add.
Step 3: Start to send transactions
After you tap Add, WalletFeed shows the message "Send Transactions to BankSync?". The message tells you the data that BankSync will receive, the Wallet accounts and the start date of the transactions.
- Read the message.
- Tap Send.
If you tap Cancel, WalletFeed removes BankSync from your destinations.
Step 4: Find the table in BankSync
-
On a computer, open app.banksync.io in a web browser.
-
Get access to your BankSync account.
-
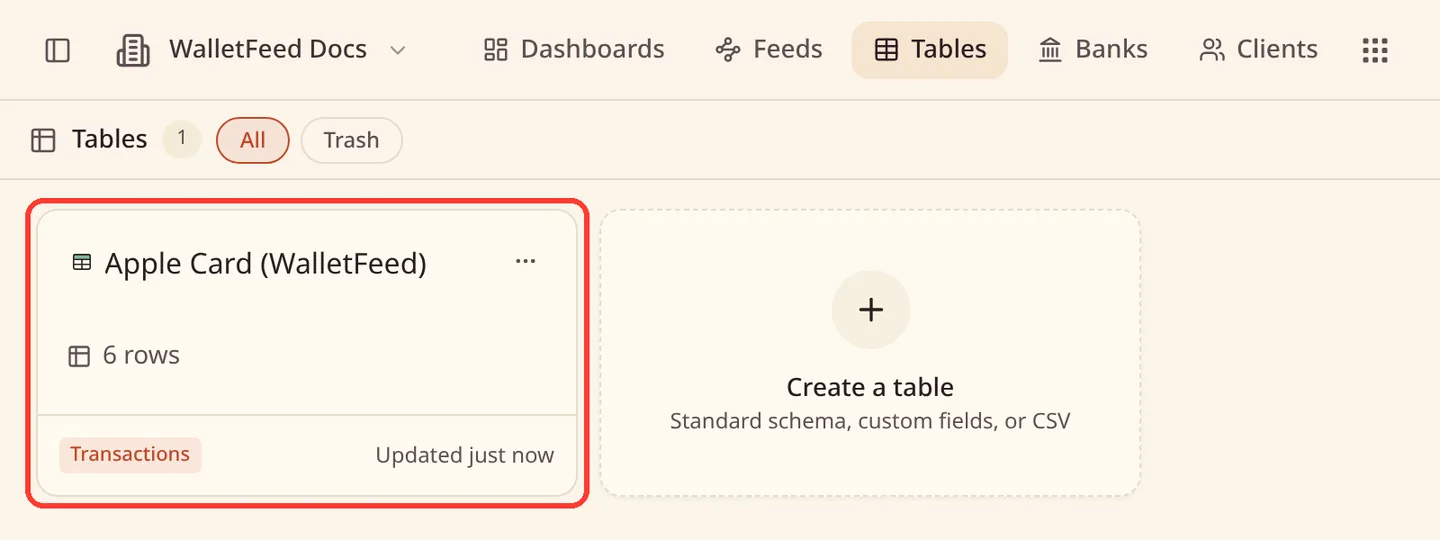
Click Tables at the top of the page.
-
If you used Sign In with BankSync, click the Apple Card table.
-
If you used an API key, click the table with the name from Table in WalletFeed.
-
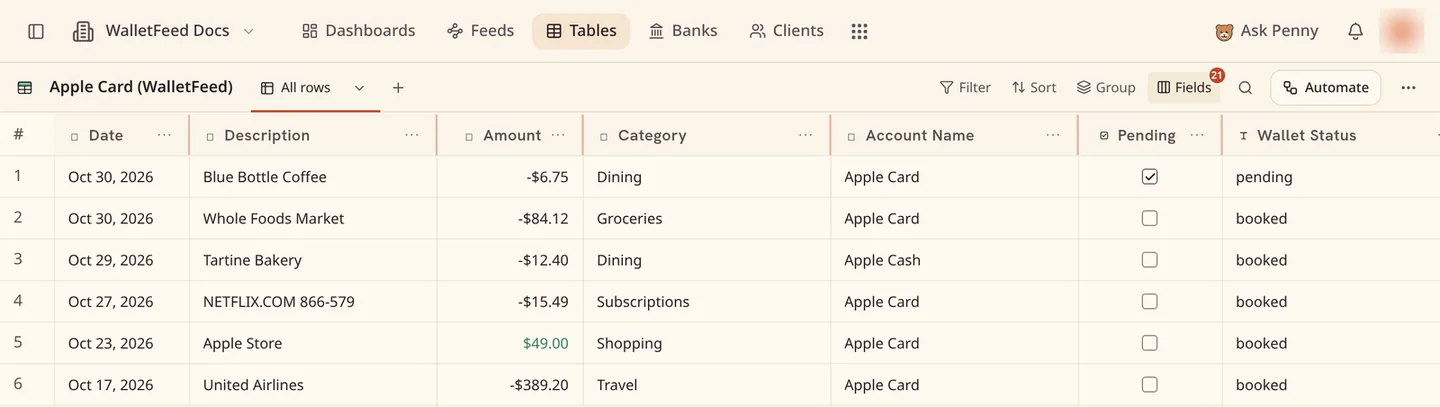
To show only the columns that have data, do the steps in If many columns in the table are empty.
Connect with an API key
You can also connect WalletFeed to BankSync with an API key. API keys are available only on BankSync's Standard plan or a higher plan. If you use an API key, WalletFeed makes the table. You can change the name of the table in WalletFeed.
The screenshots show BankSync in a web browser on a computer.
Make an API key in BankSync
-
On a computer, open app.banksync.io in a web browser.
-
Get access to your BankSync account as the owner or an admin of the workspace.
-
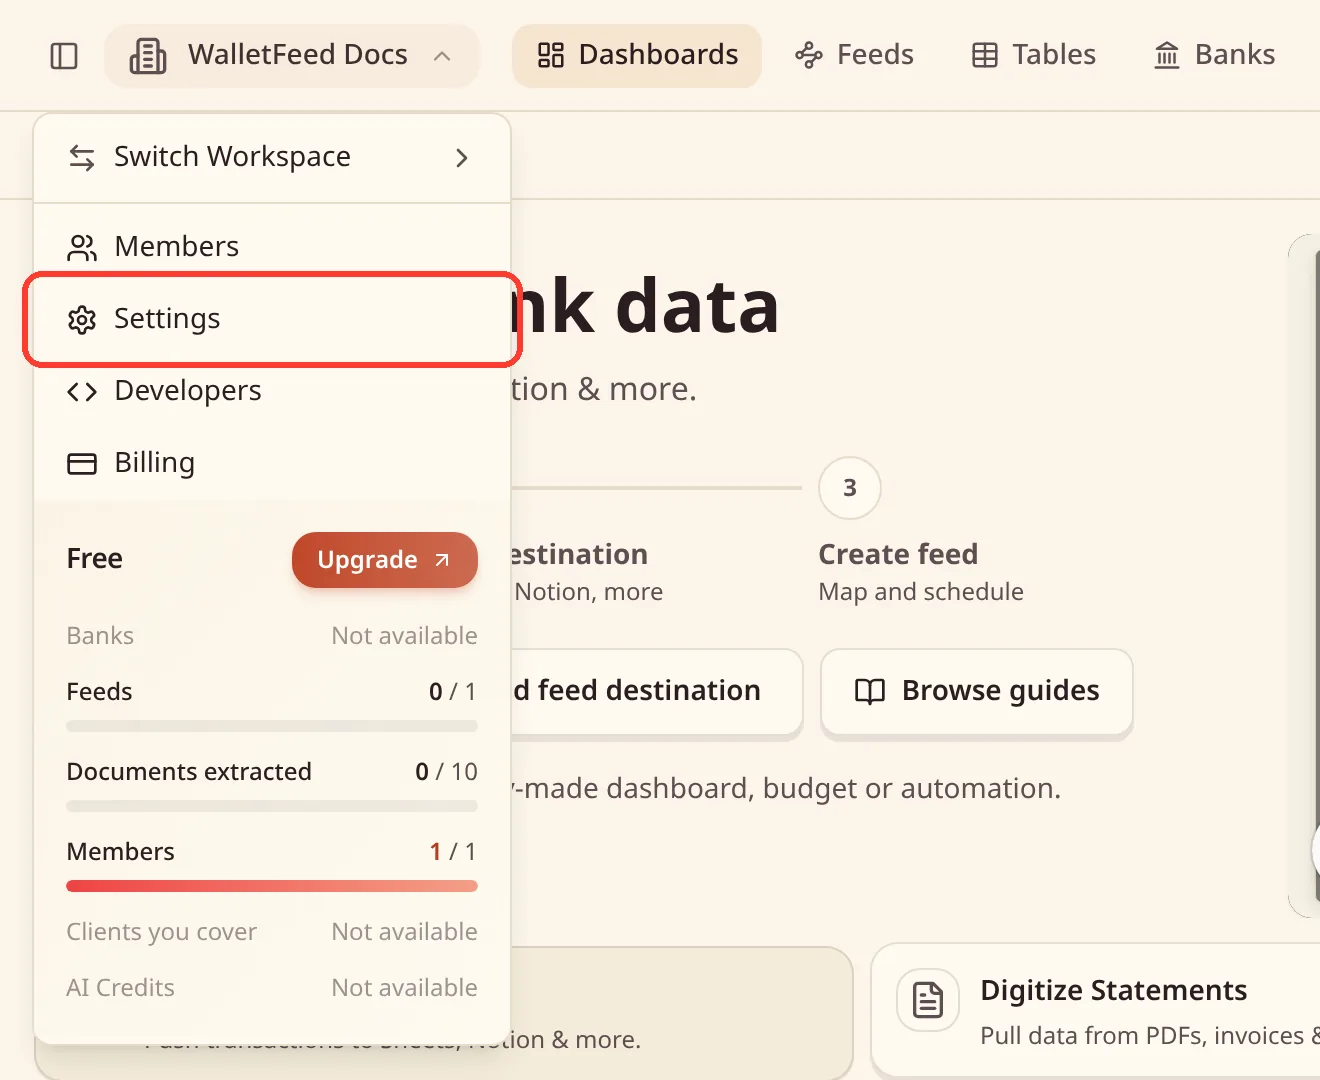
Click the workspace name at the top left of the page.
-
Click Settings.
-
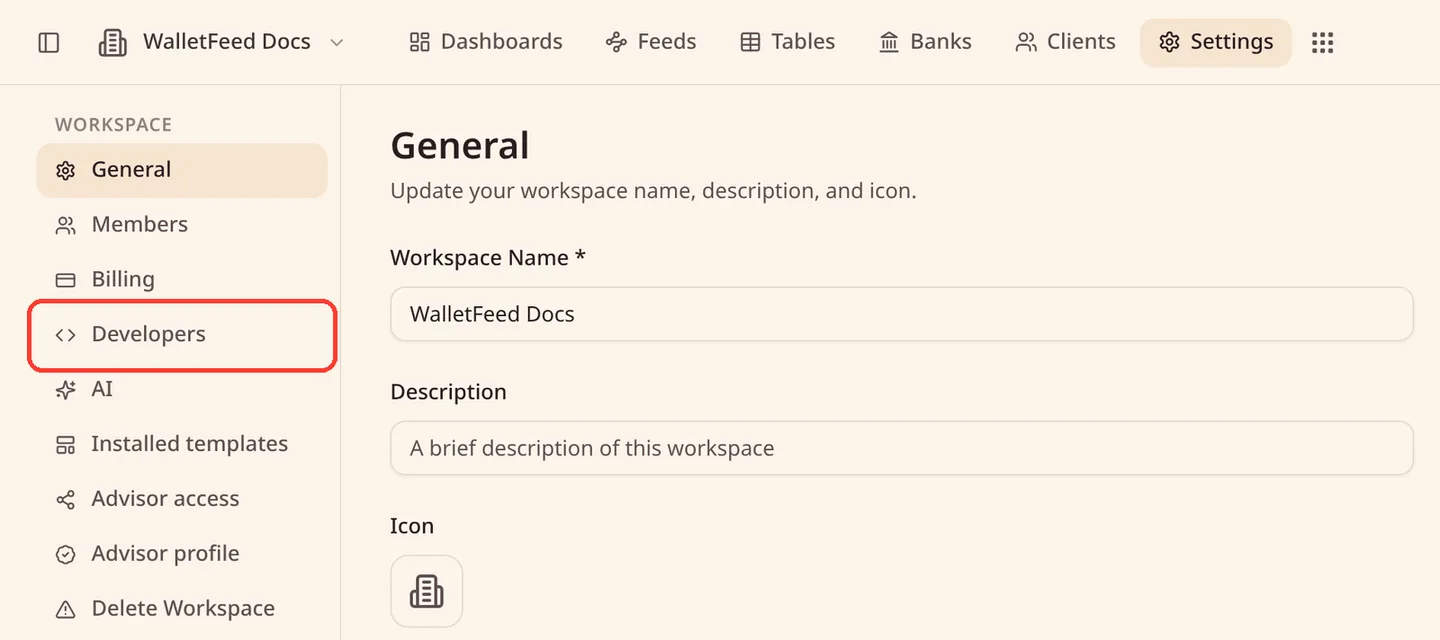
In the sidebar, in the WORKSPACE group, click Developers.
-
Click the API Keys tab.
-
Click Create Key.
-
In Key Name, type
WalletFeed. -
In Expiration, select 1 year or Never.
When you click Create Key, BankSync selects 90 days. After 90 days, WalletFeed cannot send transactions to BankSync with the expired key.
-
In Permissions, in the tables row, select read and write.
-
Click Create API Key.
-
Click the copy button (Copy to clipboard) adjacent to the
bsk_key. BankSync shows the key only one time. -
Click Done.
Add the key in WalletFeed
-
On your iPhone, open the BankSync form. Refer to Step 1.
-
Tap Use an API Key Instead.
-
Paste the key in API Key.
-
To use a different name for the table, type the name in Table.
Until you change the name, Table contains Apple Card (WalletFeed).
-
Tap Add.
-
In the message "Send Transactions to BankSync?", tap Send.
-
To find the table in BankSync, do the steps in Step 4.
Data that BankSync receives
WalletFeed adds one row to the table for each transaction. Each row gets this data:
| Data | BankSync column |
|---|---|
| The transaction ID | ID |
| The posted date, or the purchase date while the charge is pending | Date |
| The purchase date | Authorized Date |
| The value, less than 0 for a purchase and more than 0 for a credit, for example a refund | Amount |
| The value of a purchase, or 0 | Debit Amount |
| The value of a credit, or 0 | Credit Amount |
| The currency, for example USD | Currency |
| The description that Wallet shows | Description |
| The card statement text | Original Description |
| The merchant name, if Wallet has one | Merchant Name |
| The WalletFeed category, for example Groceries or Travel | Category |
| The account name, for example Apple Card or Apple Cash | Account Name |
| Selected while the charge is pending | Pending |
The Wallet status, for example pending or booked |
Wallet Status |
| The merchant category code | MCC |
| For a purchase in a different currency, the value in that currency | Foreign Amount |
| For a purchase in a different currency, that currency | Foreign Currency |
BankSync's transactions table has more columns, for example Card Last 4 and Bank. WalletFeed does not put data in them.
Read the table with an AI agent
BankSync has a REST API and an MCP server. An AI agent that you connect to BankSync can read the Apple Card table with the BankSync table tools, for example query_table_rows and aggregate_table_rows. Thus, the agent can read your Apple Card transactions and the transactions from your other banks in BankSync.
BankSync includes API and MCP access on the Standard plan or a higher plan. On the Free plan, the API Keys tab shows "API & MCP aren't included on your plan".
- To connect an AI agent, make an API key for the agent on the API Keys tab.
For more information, refer to BankSync's guide to API keys.
New and changed transactions
- While WalletFeed is open, BankSync receives changes in seconds.
- When WalletFeed is not open, iOS starts WalletFeed approximately 1 hour or less after a change in Wallet. If Background Sync is on in Settings › Sync, WalletFeed then sends the change.
- BankSync receives a pending charge with Pending selected. When the charge posts, WalletFeed changes the row of the charge. Date changes to the posted date, and Pending is not selected.
- A refund gets a new row with an Amount of more than 0.
- If a pending charge does not post, WalletFeed removes its row. BankSync moves the row to its trash.
Send previous transactions
A new destination also receives previous transactions from the start date in Settings › Sync › Initial History. Initial History is All until you change it. On the Free plan, a BankSync workspace can have a maximum of 5,000 rows.
After you add BankSync, you can send more previous transactions with Send History. Refer to Send previous transactions.
- In WalletFeed, tap Destinations.
- Tap your BankSync destination.
- Tap Send History.
- Tap 30 Days, 90 Days, 1 Year or All.
To stop Send History while WalletFeed sends the transactions, do these steps:
- Tap Send History.
- Tap Stop Sending.
Change or remove the destination
The BankSync destination has the name "BankSync ·", then the name of your BankSync workspace.
- In WalletFeed, tap Destinations.
- Tap your BankSync destination.
On the destination screen, you can do these tasks:
| Task | Steps |
|---|---|
| Send only some transactions | Set Filter to on. Refer to Choose what a destination receives. |
| Stop the destination for a time | Set Enabled to off. |
| Change the name | Type a new name in Name. |
| Replace the API key | Tap Replace Key. Paste the new key. Tap Replace. |
| Get access again with Sign In with BankSync | Tap Sign In Again. |
| Remove the destination | Tap Delete. Then tap Delete again. |
When you remove the destination, the table and its rows stay in BankSync. WalletFeed tells you "Transactions already sent stay at the destination."
In Settings › Developers in BankSync, you can remove the access that WalletFeed has to your workspace. The Connected Apps tab shows the apps that have access to your workspace. The API Keys tab shows your API keys.
If there is a problem
If BankSync shows "Upgrade to create API keys"
The Free plan and the Starter plan do not include API keys.
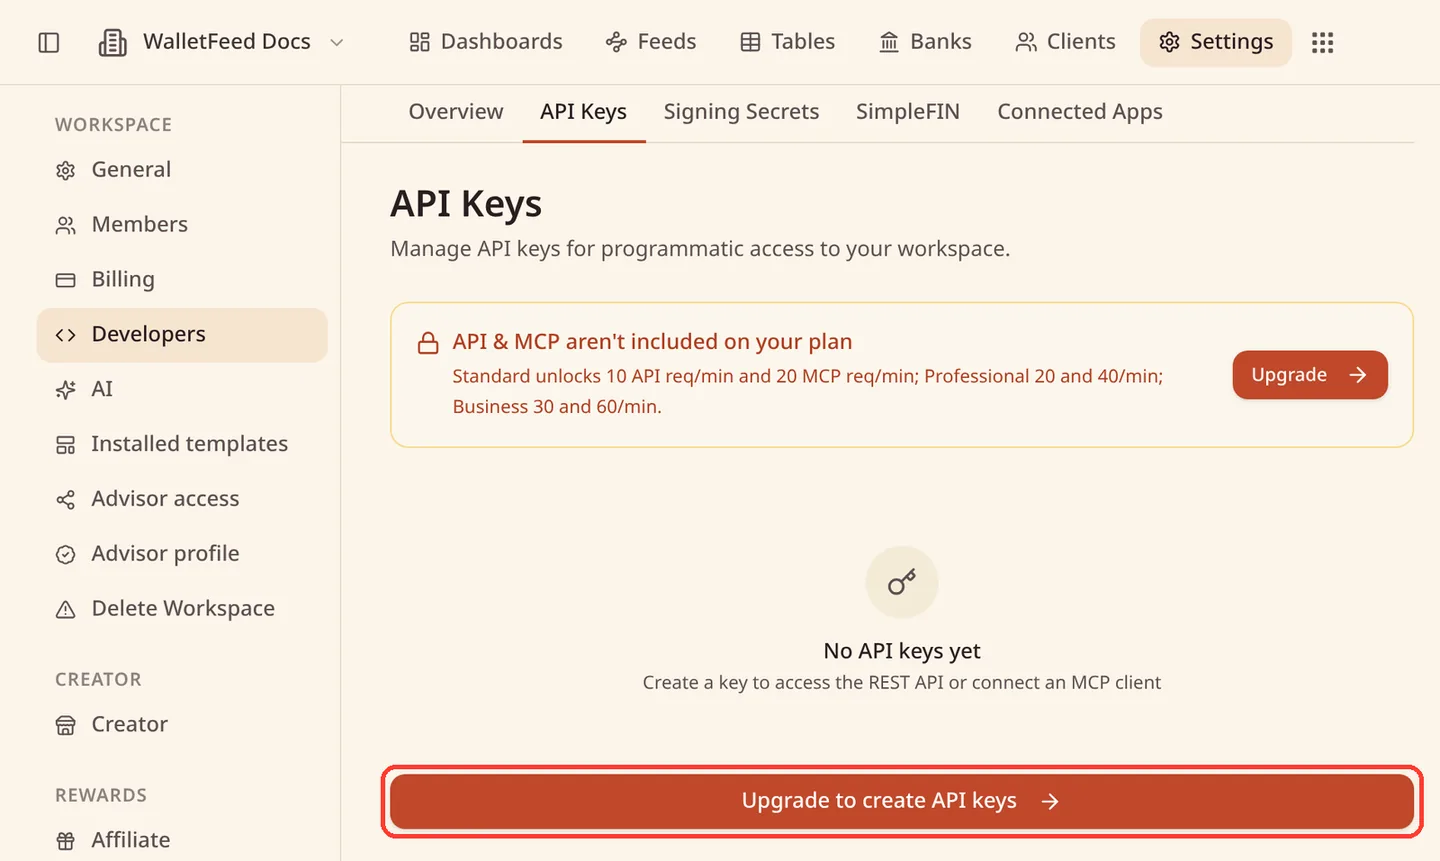
- In WalletFeed, tap Sign In with BankSync Instead.
- Do the steps in Step 2.
You can also change to the Standard plan or a higher plan in BankSync. Then you can use an API key.
If WalletFeed shows "Key rejected"
BankSync did not accept the key. These are the possible causes:
- The key is incorrect or expired.
- The key does not have read and write in the tables row.
- The workspace is on the Free plan or the Starter plan. These plans do not include API keys.
-
Make a new key. Refer to Make an API key in BankSync.
-
If the BankSync form is open, do these steps:
- Paste the new key in API Key.
- Tap Add.
-
If Destinations shows your BankSync destination, do these steps on the destination screen:
- Tap Replace Key.
- Paste the new key.
- Tap Replace.
If WalletFeed shows "hasn't created or shared the Apple Card table"
The workspace has the maximum number of tables for its plan, or BankSync did not make the table in approximately 30 seconds. WalletFeed tells you the limit of your plan, for example "The Free plan allows one table."
The table limit is 1 on Free, 2 on Starter, 5 on Standard, 25 on Professional and 100 on Business.
- Tap Open BankSync.
- Delete a table that you do not use, or change to a plan that has more tables.
- In WalletFeed, tap Try Again.
- If WalletFeed shows the message again, tap Sign In Again.
If BankSync does not accept the sign-in
Only the owner or an admin of the workspace can give WalletFeed access to the workspace. WalletFeed shows "BankSync didn't accept the sign-in", or BankSync shows a message on its page.
- Tap Sign In with BankSync again.
- Get access to your BankSync account as the owner or an admin of the workspace.
- If BankSync does not accept the sign-in again and your plan includes API keys, use an API key. Refer to Connect with an API key.
If the destination shows "Authentication failed"
BankSync did not accept the key or the sign-in. An expired API key can cause this message.
-
In WalletFeed, tap Destinations.
-
Tap your BankSync destination.
-
If the destination screen shows Replace Key, do these steps:
- Make a new key. Refer to Make an API key in BankSync.
- Tap Replace Key.
- Paste the new key.
- Tap Replace.
-
If the destination screen shows Sign In Again, tap Sign In Again.
WalletFeed can also show "Signed out. Sign in again in the destination's settings." Step 4 corrects this problem.
If BankSync does not accept new rows
Your BankSync workspace has the maximum number of rows for your plan, for example 5,000 rows on the Free plan. The destination then shows the error from BankSync.
- In BankSync, delete rows that you do not use, or change to a plan that has more rows.
If BankSync shows only its logo
After you tap the hyperlink in the e-mail from BankSync, the BankSync page can show only the BankSync logo.
- Load the page again.
If BankSync has no Tables tab
BankSync's documentation tells you that Tables is in beta, and that BankSync activates Tables for each workspace.
- In BankSync, click Settings › Support.
- Tell BankSync customer support that your workspace has no Tables tab.
If many columns in the table are empty
A BankSync transactions table has 24 columns, and WalletFeed puts data in 12 of them. The table also has 5 more columns for WalletFeed data, for example Pending and Wallet Status, at the right end of the table.
- In the table, click Fields.
- Remove the empty columns from the view.
- Click Save view.
Related
Updated October 30, 2026